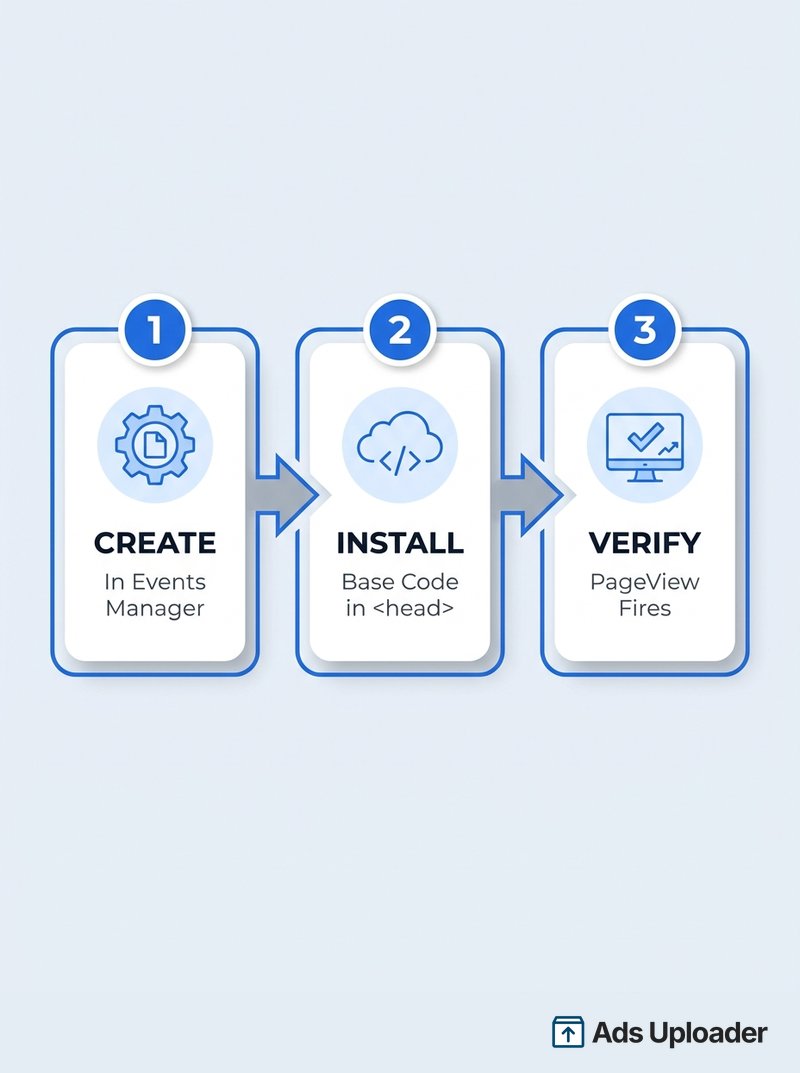
Setting up the Meta Pixel takes three steps: create the pixel, install its code, and verify it fires. You create the pixel in Meta Events Manager by selecting Connect Data, choosing Web, and naming a new dataset, which generates a base code snippet containing your Pixel ID. You add that snippet to your website's head section manually, through a partner integration, or through a tag manager. You then confirm a PageView event registers using the Test Events tool or the Meta Pixel Helper browser extension.
Most "my pixel isn't working" problems trace back to a rushed setup, not a broken pixel. Skip a step, paste the code in the wrong place, or never check that it fires, and Meta optimizes your campaigns against bad data without telling you. Get the three steps right once and tracking quietly works in the background for as long as the ad account exists.
This guide covers how to set up the Meta Pixel in the current 2026 Events Manager, including the newer dataset terminology and the Connect Data flow that replaced the old Ads Manager pixel screen. It owns the process from nothing to a verified PageView. If you want the background on what the Meta Pixel is and how it works, start with the pillar guide, then come back here to install it.
What You Need Before You Start
Three things, and about ten minutes:
- Access to Meta Events Manager through a Meta Business portfolio with an ad account. This is where every pixel now lives.
- A website you can edit, or access to a partner integration or tag manager that can add code for you.
- The ability to publish a change, since the pixel only works once the code is live on the site.
The pixel itself is free. You only pay for the ads that use the data it collects. Think of the pixel as the browser-side half of Meta's tracking; later you can pair it with the server-side Conversions API for more complete measurement, but you do not need that to start.
Step 1: Create Your Meta Pixel in Events Manager
Everything starts in Events Manager, not Ads Manager. The old Ads Manager pixel screen is deprecated.
- Open Meta Events Manager.
- Check the top corner to confirm you are in the correct business portfolio and ad account before you create anything. Creating a pixel under the wrong portfolio is a common and annoying mistake to undo.
- Click the green Connect Data button, then select Web as your data source and click Connect.
- Create and name a new dataset. A clear convention is your business name plus "Pixel," for example "Northside Coffee Pixel."
- Finish creating it. Meta generates your Pixel ID, which you can view anytime under the dataset's Settings tab.
One change that trips people up in 2026: Meta now calls pixels datasets inside Events Manager. It merged web, app, and offline events into a single view, and per Meta's documentation, "your new dataset ID is the same as your pixel ID." So a dataset and a pixel are the same object, and the dataset ID is the number you will paste into your site. If you ever need to locate or reuse that number, here is how to find your Pixel ID.
Meta Pixel Only or Pixel Plus Conversions API
During setup, Meta asks whether you want Meta Pixel and Conversions API or Meta Pixel only, and whether you want it to Get guidance or let you Set up manually. You can pick Meta Pixel only for now and add the Conversions API later; nothing about choosing pixel-first locks you out. For this guide we stay pixel-first so you can get a working install and a verified event quickly. Plan to add the Conversions API once the basics are confirmed, because it materially improves measurement in 2026.
Step 2: Install the Meta Pixel on Your Website
There are three ways to get the code onto your site. Pick one. Installing it more than one way is how people end up with duplicate pixels and double-counted events.
Option A: Add the Base Code Manually
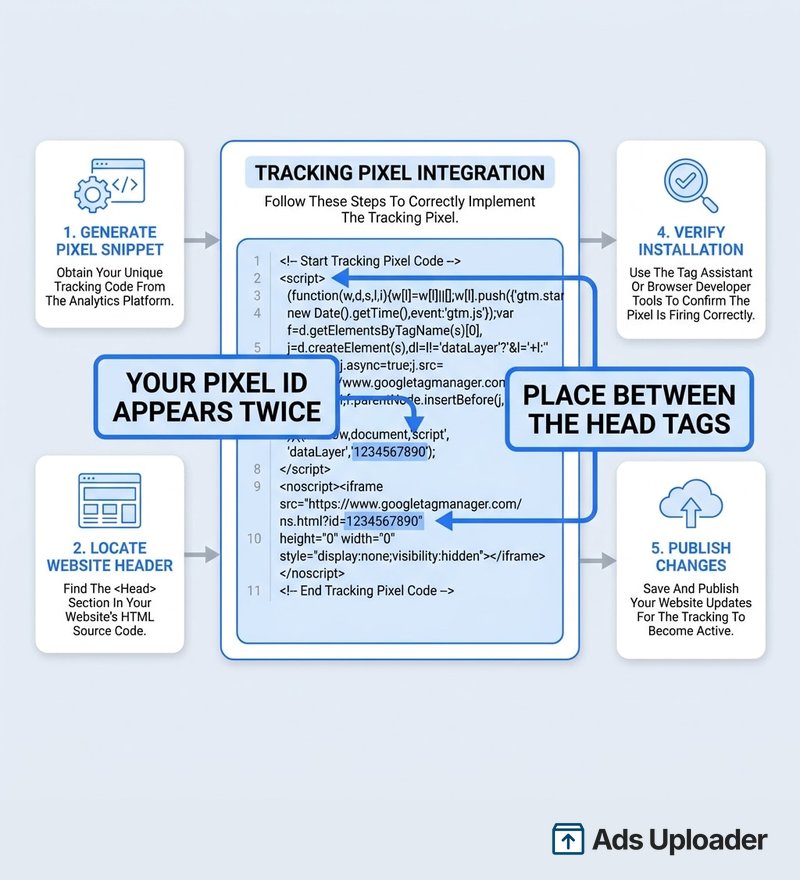
Copy the base code snippet that Events Manager shows you. It looks like this:
<!-- Meta Pixel Code -->
<script>
!function(f,b,e,v,n,t,s){...}(window, document, 'script', 'https://connect.facebook.net/en_US/fbevents.js');
fbq('init', '<YOUR_PIXEL_ID>');
fbq('track', 'PageView');
</script>
<noscript>
  <img height="1" width="1" style="display:none"
       src="https://www.facebook.com/tr?id=<YOUR_PIXEL_ID>&ev=PageView&noscript=1"/>
</noscript>
<!-- End Meta Pixel Code -->
Notice your Pixel ID appears twice, once in the fbq('init', ...) call and once in the <noscript> image fallback. Both should hold the same number.
Paste the snippet between the opening and closing <head> tags on every page of your site. Head placement matters for a concrete reason: the pixel fires before slower, render-blocking scripts load, so a sluggish page or a script error further down cannot stop the tracking request from going out. It is also less likely to be stripped by optimization plugins than code further down the page. Most sites add it to a global header template so it appears everywhere automatically.
Launch More. Click Less.
Upload hundreds of creatives at once, auto-match thumbnails to videos, and publish straight to your ad accounts through Meta's API.
Try Ads Uploader FreeNo credit card required • 7-day free trial
Option B: Use a Partner Integration
If you would rather not touch code, Meta detects supported platforms and offers a guided partner integration that installs the pixel for you. This is the least error-prone route for non-developers. The trade-off is that you should not also paste the manual snippet, or the integration and your code will both fire and duplicate events.
Option C: Use a Tag Manager
If you manage tracking through Google Tag Manager, add the pixel as a Custom HTML tag containing the same script and set it to fire on All Pages. Meta does not ship an official GTM tag, but this method is reliable as long as the trigger covers every pageview. Verify the tag fires in GTM's preview mode before you publish the container.
Platform-Specific Installs (Shopify, WordPress, Website Builders)
Keep platform installs simple and use the built-in path when one exists:
- Shopify: Connect through the Meta (Facebook & Instagram) sales channel rather than editing theme code. In the channel settings, choose a Customer Data Sharing level (Standard, Enhanced, or Maximum), which installs and manages the pixel for you. If you previously pasted pixel code into your theme, remove it so you do not run two pixels. For the complete walkthrough, see the full Shopify pixel setup.
- WordPress: A dedicated tracking plugin like PixelYourSite is the usual route; Meta's own pixel plugin exists but has a mixed track record. For stores, the Facebook for WooCommerce plugin handles the pixel and Conversions API together. For everything else, paste the base code with a header and footer snippet plugin such as WPCode, or use GTM. The WordPress pixel install guide compares all five routes.
- Website builders (Wix, Squarespace, and similar): Most do not need the full snippet. You enter your Pixel ID in the marketing or integrations settings and the platform adds the code.
Whatever the platform, the rule holds: one pixel per domain, installed one way.
Step 3: Verify Your Pixel Is Firing
This is the step that is easy to skip, and skipping it is why setups quietly fail. Do not assume the pixel works because Events Manager created it. Confirm it.
Use the Test Events Tool
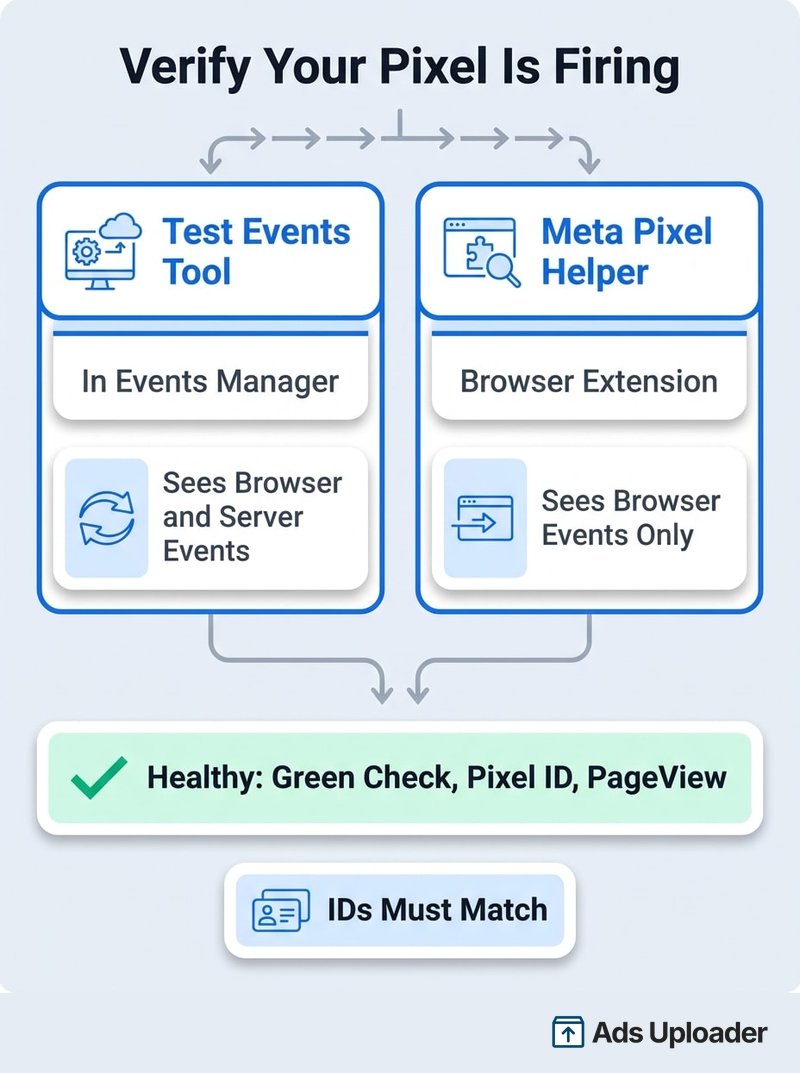
Open your dataset in Events Manager and go to the Test Events tab. Enter your website URL and open it. As the page loads in the new tab, a PageView event should appear in Test Events in real time, stamped with the moment it fired. Live events here mean the browser pixel is working. The header on this screen shows your Dataset ID, which should match the ID in your code.
Save Hours on Creative Testing
Stop uploading ads one by one. Bulk process unlimited creatives with automatic media matching and direct API publishing.
Try Ads Uploader FreeNo credit card required • 7-day free trial
Use the Meta Pixel Helper Extension
For a faster spot check, install the Meta Pixel Helper Chrome extension, open your site, and click its icon. A green check next to your Pixel ID, plus a listed PageView event, confirms the pixel fired in the browser. Note that the 2026 version requires you to be logged into Facebook, and that the extension only reads client-side events. It cannot see server-side Conversions API events, so use Test Events when you need to confirm those.
Confirm the IDs Match
Whichever tool you use, check that the Pixel ID it reports matches the dataset ID in Events Manager under Settings. A mismatch means the wrong pixel, or an old one, is installed on the page - and your data is flowing into a dataset nobody is looking at.
Turn on Advanced Matching and Standard Events
Once a PageView is confirmed, two quick additions make the pixel far more useful.
Advanced matching is a toggle in your dataset settings. When enabled, Meta uses hashed customer information such as email and phone number to match more conversions back to people, which improves attribution. Turn on the available fields. If you used a partner integration, it often handles this as part of data sharing.
Standard events are the actions beyond a basic page load. PageView fires automatically, but to track meaningful moments like ViewContent, AddToCart, and Purchase, you add events one of two ways. The point-and-click Event Setup Tool in Events Manager lets you click buttons on your live site to designate them as events with no code. Alternatively, a developer can add fbq('track', 'EventName', {parameters}) calls in your page code for precise control. These events are what tell Meta's algorithm what a real conversion looks like for your business.
Why Your Meta Pixel Might Not Be Firing
When events do not show up, the cause is almost always one of these:
- Code in the wrong place. The base code must sit in the
<head>and load site-wide. In the footer or on a single page, most events never fire. - Duplicate pixels. Running a partner integration and manual code together, or pasting the snippet twice, sends conflicting data. Remove one source.
- Wrong Pixel ID. A typo or an old ID means Events Manager sees no traffic. Match the ID in your code to the dataset ID.
- Ad blockers and browser tracking prevention. These block
fbevents.jsfor some visitors, so the client-side pixel will not fire for them. This is expected, and the Conversions API is how you recover those events. - Aggressive caching. A cached or minified page can serve an old version without the pixel. Clear the cache or exclude the snippet from it.
- Consent banners. A consent management platform that holds scripts until a visitor opts in will delay or block the pixel. Check that it is configured to load the pixel after consent.
Work through this list, then re-run Test Events to see which layer is breaking. Meta's guidance throughout 2026 is to pair the browser pixel with the Conversions API so blockers and privacy limits cost you less data.
Frequently Asked Questions
Is the Meta Pixel free to set up? Yes. The Meta Pixel is a free tool. You do not pay to create it or install it, and you only pay for the ads that use its data. Setting up the pixel simply enables tracking; the cost comes from the campaigns you run on top of it.
Where do I put the Meta Pixel code on my website? Paste the base code between the opening and closing head tags on every page of your site. If you use a CMS or tag manager, add it to the global header so it loads site-wide. Head placement makes the pixel fire as early as possible and reduces the chance other scripts block it.
How do I know my Meta Pixel is working? Use two checks. Open the Test Events tab in Events Manager, enter your URL, load the page, and watch a PageView register in real time. Then open your site with the Meta Pixel Helper Chrome extension; a green check, your Pixel ID, and a PageView event confirm the pixel fired in the browser.
Do I need a developer to install the Meta Pixel? Usually no. Partner integrations and tag managers let you install the pixel without touching code. Manual installation is mostly just pasting one snippet into your site header. You may want a developer for custom standard events beyond the automatic PageView, or for a server-side Conversions API setup.
Can I have more than one Meta Pixel on the same website? Technically yes, but it is not recommended. Two pixels firing on the same domain double-count traffic and muddy your reporting. Use one pixel per domain in most cases. Multiple pixels only make sense when they serve genuinely separate ad accounts or businesses.
Do I also need the Conversions API? It is not required for the pixel to work, but Meta recommends it. The Conversions API sends events from your server to recover data lost to ad blockers, browser tracking prevention, and iOS limits. The pixel handles browser-side tracking; the Conversions API adds a server-side layer for more reliable measurement.
My Meta Pixel is set up but shows no data. What is wrong? Confirm the code is live and published on the site with the correct Pixel ID. Check it with the Meta Pixel Helper to see whether the script loads and fires. Open Test Events and browse your site. If you still see nothing, an ad blocker or consent banner may be blocking it, so try a clean browser, and make sure you are viewing the right dataset in Events Manager.
Setup Done, Now Make It Count
Setting up the Meta Pixel comes down to three acts you can finish in one sitting: create the dataset in Events Manager, install the base code in your site's head, and verify a live PageView with Test Events or the Pixel Helper. Confirm the IDs match and you have a clean foundation.
From there, turn on advanced matching, map your key actions with standard events, and plan to add the Conversions API so privacy changes cost you less measurement over time. The pixel is the groundwork. Once it fires reliably, every campaign you run on top of it optimizes against real data instead of guesses.