Launching Ads
This is the existing-ad configuration approach: you pick an ad that's already live in your account as the model, and Ads Uploader copies its setup onto your new ads, then creates them in real time with full control over creative enhancements and flexible text.
Overview
This method:
- Reads the model ad's setup straight from your Meta account
- Allows browsing and selecting existing ads as templates
- Creates ads immediately in your account
- Provides full control over all ad settings
- Supports multiple headlines and descriptions
Step 1: Select Source Ad
Three-Column Navigation
The ad selector presents your account structure in three columns:
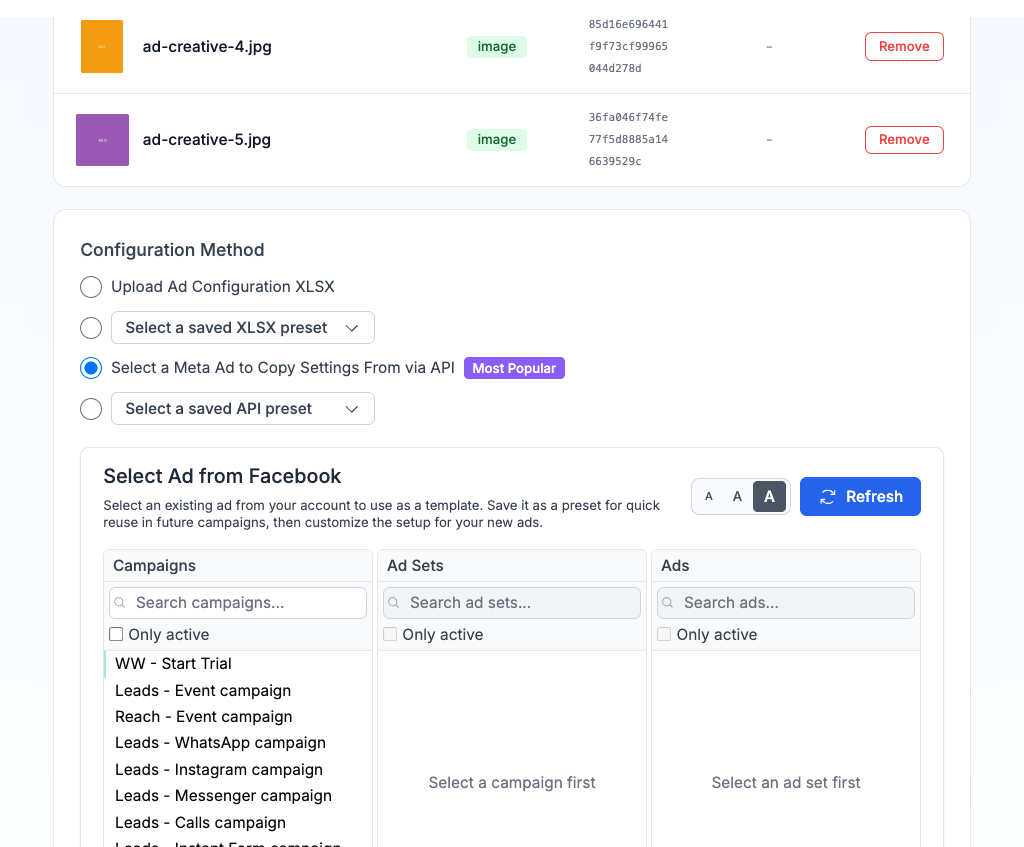
- Campaigns (Left) - Shows all campaigns in your account
- Ad Sets (Middle) - Displays ad sets for the selected campaign
- Ads (Right) - Lists ads in the selected ad set
Click through each column to drill down to the ad you want to use as a template.
Finding the Right Ad
Each column has filter options:
- Search box: Type to filter by name
- Only active: Toggle to show/hide paused items
- Text size buttons (A A A): Adjust text size in the selector
After selecting an ad, a Configuration Source box confirms your selection showing the campaign, ad set, and ad name. You can Save as Preset for quick reuse or Reset Selection to start over.
Step 2: Configure Campaign Structure
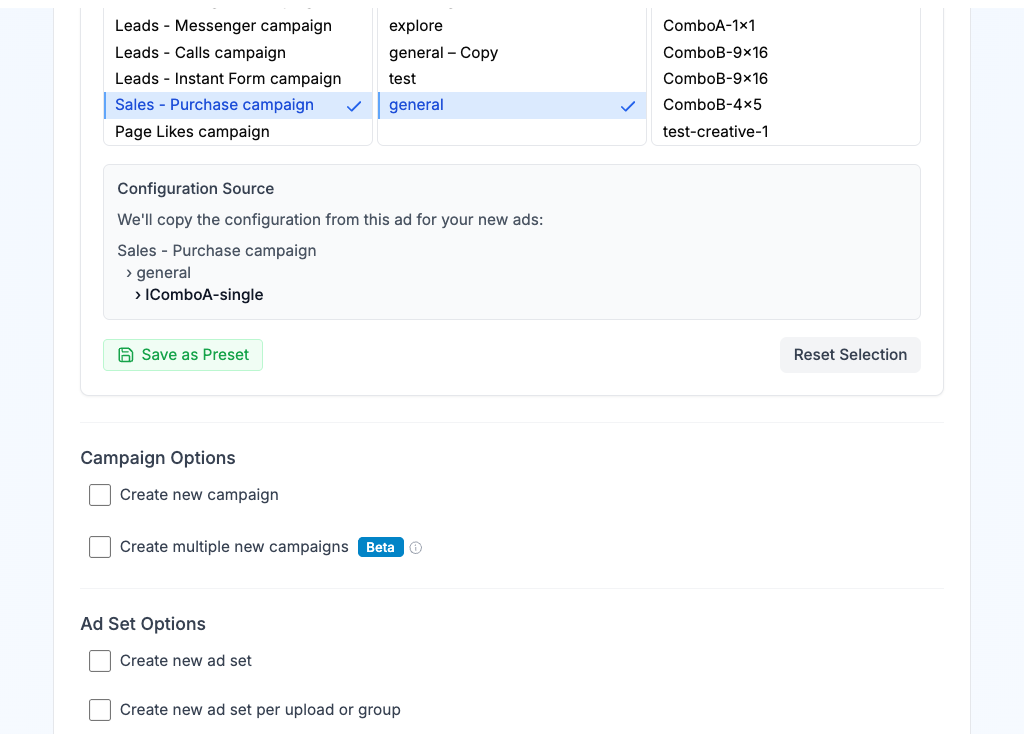
Campaign Options
| Option | Description |
|---|---|
| Use existing campaign (default) | Adds new ads to the selected campaign |
| Create new campaign | Generates a new campaign with a custom name |
| Create multiple new campaigns | Split or duplicate ads across multiple campaigns |
Ad Set Options
| Option | Description |
|---|---|
| Use existing ad set (default) | All ads go into the selected ad set |
| Create new ad set | Creates a single new ad set with a custom name |
| Create new ad set per upload or group | Creates individual ad sets per file or variation group |
| Auto-divide ads into ad sets | Splits uploads into ad sets by a fixed count |
| Build custom ad set configuration | Manually assign uploads to specific ad sets |
See Ad Grouping for details on organizing uploads into ad sets.
Preview Table
A preview table shows the exact campaign structure that will be created, including Campaign ID/Name, Ad Set ID/Name, and Ad Name for every ad.
Step 3: Configure Profile
Profile Options
Select which Facebook Page and Instagram Account your ads will post from.
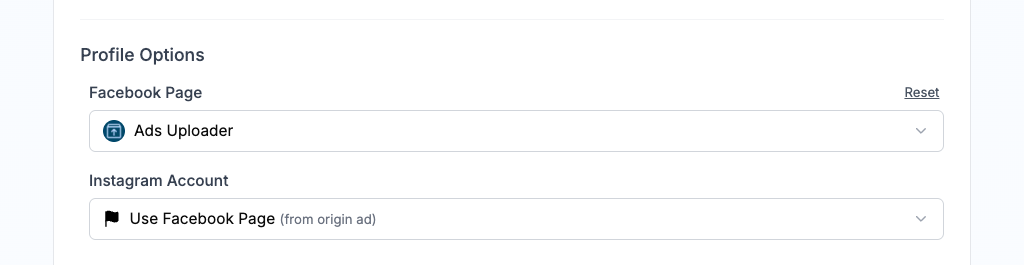
| Setting | Description |
|---|---|
| Facebook Page | The page your ads will be published under |
| Instagram Account | The Instagram account for Instagram placements (can use "Use Facebook Page" for default) |
These default to the profiles from your source ad. Use the Reset link to restore the original values.
Step 4: Configure Ad Text
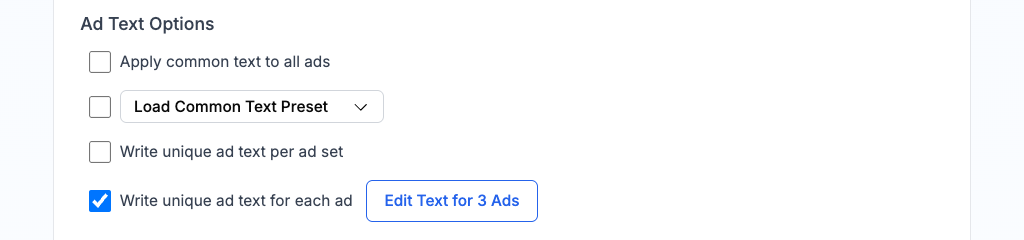
Text Mode Options
| Mode | Description |
|---|---|
| Apply common text to all ads | Same text shared across all ads. Fastest setup. |
| Write unique ad text per ad set | Different text for each ad set group. Opens editing table. |
| Write unique ad text for each ad | Complete control over individual ads with media thumbnails for reference. |
You can also load a saved Common Text Preset to quickly apply previously saved text configurations.
Text Fields
| Field | Description |
|---|---|
| Headlines | Ad headline text. Add multiple with the + button (up to 5). |
| Primary Texts | Main ad body text. Add multiple with the + button (up to 5). |
| Link Description | Description shown below the headline |
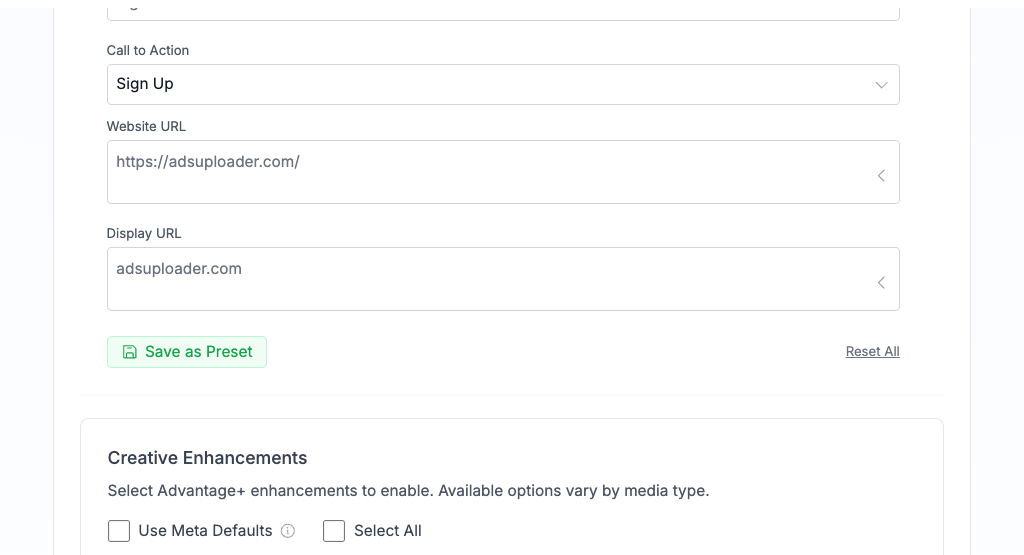
| Call to Action | Button text (Learn More, Shop Now, Sign Up, etc.) |
| Website URL | Destination link when users click the ad |
| Display URL | Shortened URL shown on the ad (e.g., adsuploader.com) |
Text fields are pre-filled from your source ad. Click the pencil icon to edit the original text, or type new text to override it.
Flexible vs. Separate Text Strategy
Flexible Texts (Recommended):
- Meta automatically tests combinations of your headlines, texts, and descriptions
- Performance tracked at ad level
Separate Ads:
- Creates individual ad for each text combination
- Detailed reporting per text variant
Toggle between strategies using the switch above your text inputs.
Save as Preset
Click Save as Preset below the text fields to save your text configuration for reuse. Click Reset All to restore the original text from the source ad.
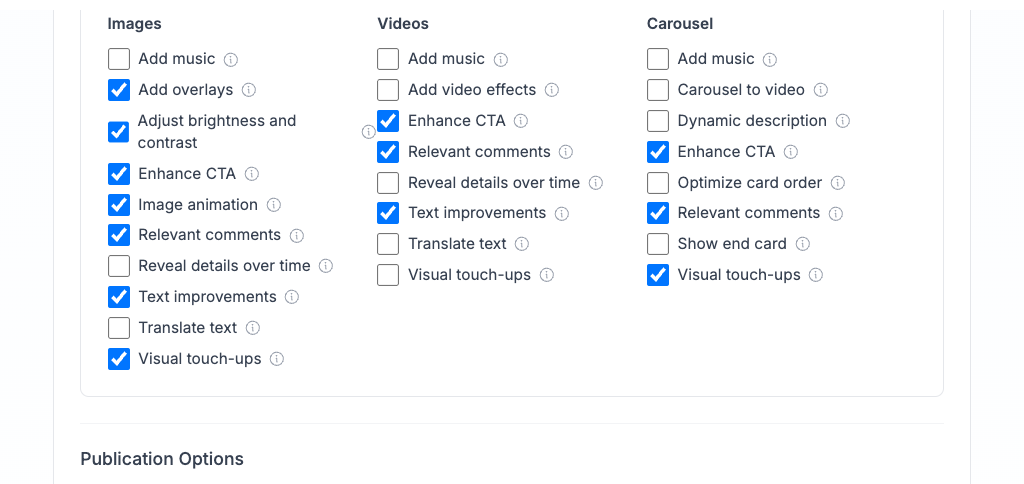
Step 5: Creative Enhancements
Control Meta's Advantage+ automatic optimizations for your ads. Checkboxes reflect the current settings from your source ad and can be toggled individually. Unchecked enhancements are sent as explicit opt-outs when Meta requires a complete enhancement spec.
Quick Controls
| Control | Description |
|---|---|
| Select All | Enable all available enhancements. Uncheck it to clear all selected enhancements. |
Available Enhancements
Enhancements are organized by media type. Available options vary:
| Enhancement | Images | Videos | Carousel |
|---|---|---|---|
| Add music | Yes | Yes | Yes |
| Add overlays | Yes | - | - |
| Add video effects | - | Yes | - |
| Adjust brightness and contrast | Yes | - | - |
| Carousel to video | - | - | Yes |
| Dynamic description | - | - | Yes |
| Enhance CTA | Yes | Yes | Yes |
| Image animation | Yes | - | - |
| Optimize card order | - | - | Yes |
| Relevant comments | Yes | Yes | Yes |
| Reveal details over time | Yes | Yes | - |
| Show end card | - | - | Yes |
| Text improvements | Yes | Yes | - |
| Translate text | Yes | Yes | - |
| Visual touch-ups | Yes | Yes | Yes |
Step 6: Publication Options
| Option | Description |
|---|---|
| Create ads in paused status | Ads are created but won't run until you manually activate them in Meta Ads Manager |
| Schedule start time | Set a specific date and time for ads to start (only available when creating new ad sets) |
| Test Mode | No ads will be published. Shows exactly what would be created. |
Step 7: Create Ads
- Click "Create Ads" button
- Confirm settings in the confirmation popup
- Monitor progress in the real-time progress panel