How to Use Ads Uploader
This guide walks through how the Uploader works end to end: media naming, automatic grouping, thumbnails, placements, and using an existing ad as the model for a new launch.
New here? If you have not created your account or connected Meta yet, start with Sign Up and Connect Meta, then come back to this page.
How Ads Uploader Thinks About a Launch
Ads Uploader is easiest to understand as a three-step workflow:
- Upload the media you want to launch.
- Configure how that media should become ads.
- Launch the ads into your Meta ad account.
In Ads Manager you usually start with campaign and ad set structure. In Ads Uploader you start with media, because a launch begins with a batch of creative assets (videos and images) that you want to turn into ads.
The key idea: Ads Uploader uses your file names to understand which files belong together. Files that share a base name and carry recognized ratio or thumbnail suffixes are grouped into the same ad automatically.
Step 1: Pick the Ad Account
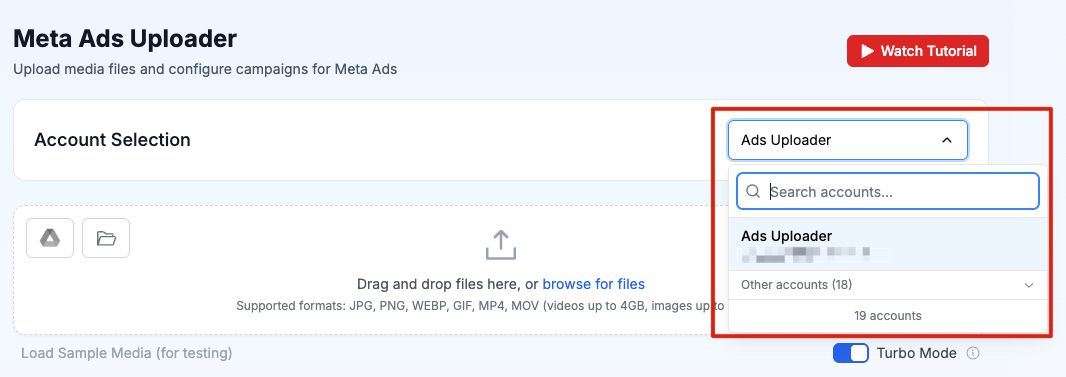
Open the Uploader and pick the ad account you want to work in from the Account Selection dropdown.
If you manage several ad accounts, they all appear in the list. The dropdown is searchable, and you can mark the accounts you use most as favorites in Account > Defaults > Favorite Accounts so they show at the top.
Step 2: Upload Your Media
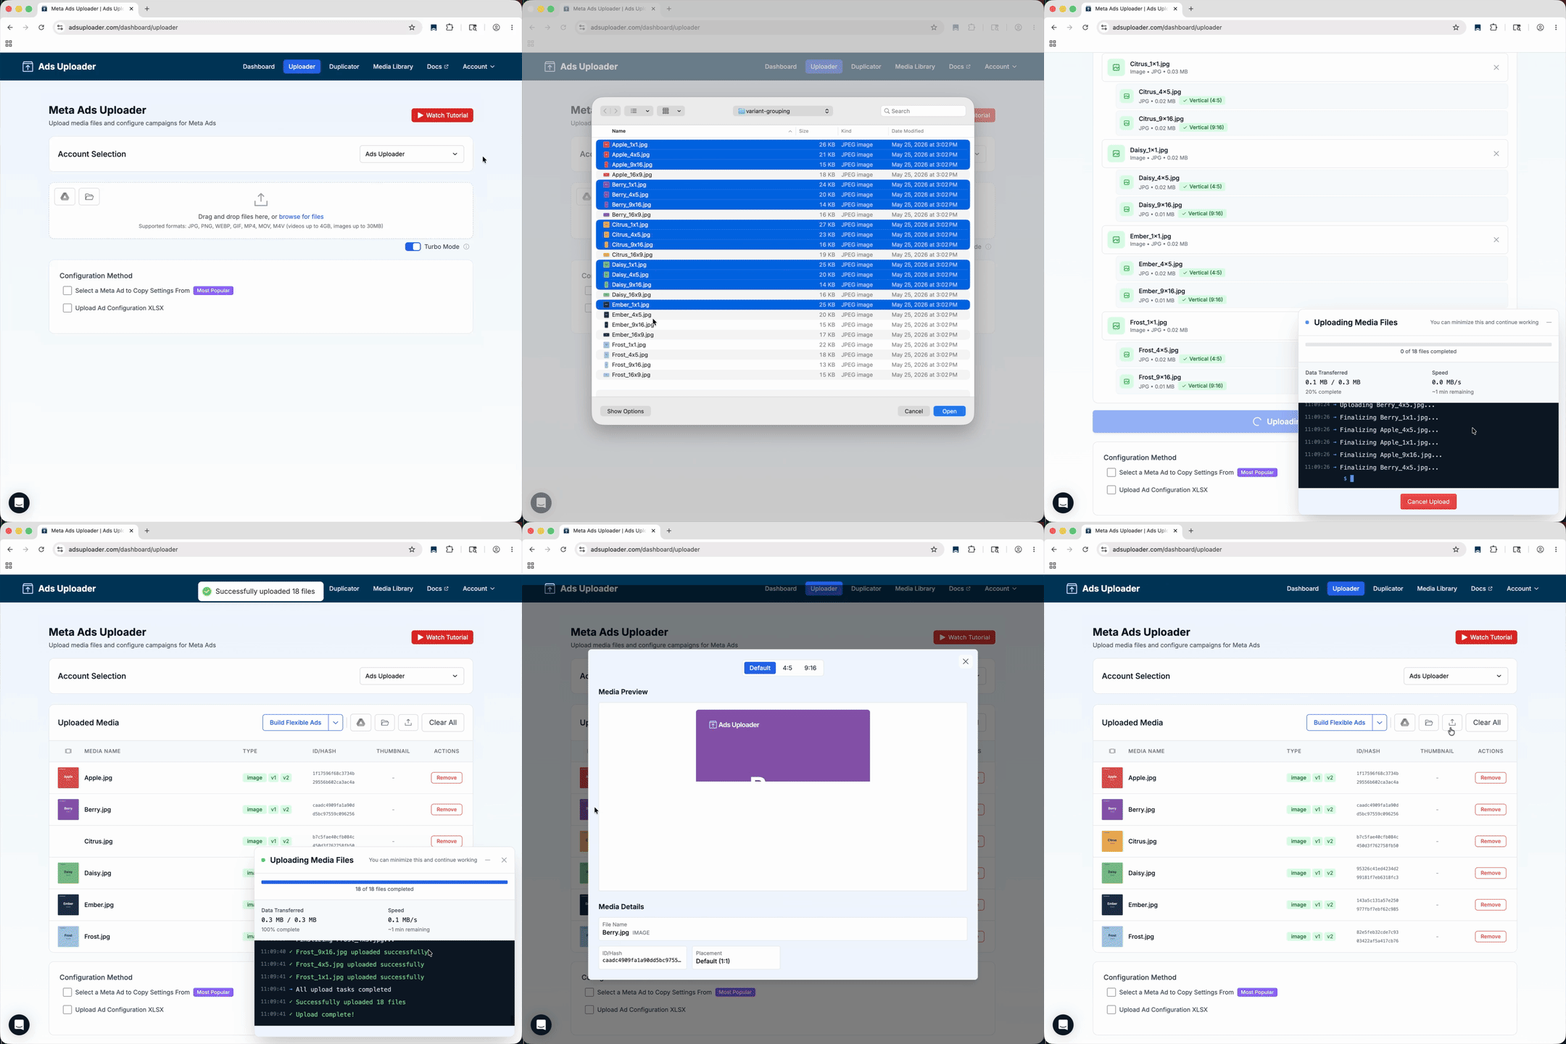
Upload the creative files you want to launch. This can include videos, images, multiple aspect ratios, and thumbnails. Ads Uploader inspects the file names and groups related assets together before you configure the launch.
Drag files onto the upload area, or use the icons to import from Google Drive, import by link, or load from the Media Library. Then click Upload Files. See Uploader Panel for every upload option.
How Name Grouping Works
The most important rule: keep the base name identical, then add a suffix for the ratio or thumbnail.
For example, these three files become one ad with three variants:
BlackFriday_Hero_1x1.mp4
BlackFriday_Hero_4x5.mp4
BlackFriday_Hero_9x16.mp4
The shared base name is BlackFriday_Hero. The suffix tells Ads Uploader which aspect ratio each file is.
Good naming pattern:
CreativeName_Ratio.filetype, for exampleBlackFriday_Hero_9x16.mp4.
Avoid changing the base name between variants. If one file is
BlackFriday_Hero_1x1.mp4and another isBlackFriday_Main_9x16.mp4, Ads Uploader treats them as separate ads, because the base names are different.
Supported Ratio Suffixes
You can group up to five ratios on a single ad: 1x1, 4x5, 9x16, 16x9, and 1.91x1. The most common setup is the 1x1, 4x5, and 9x16 trio. That covers the bulk of Meta placements with minimal cropping.
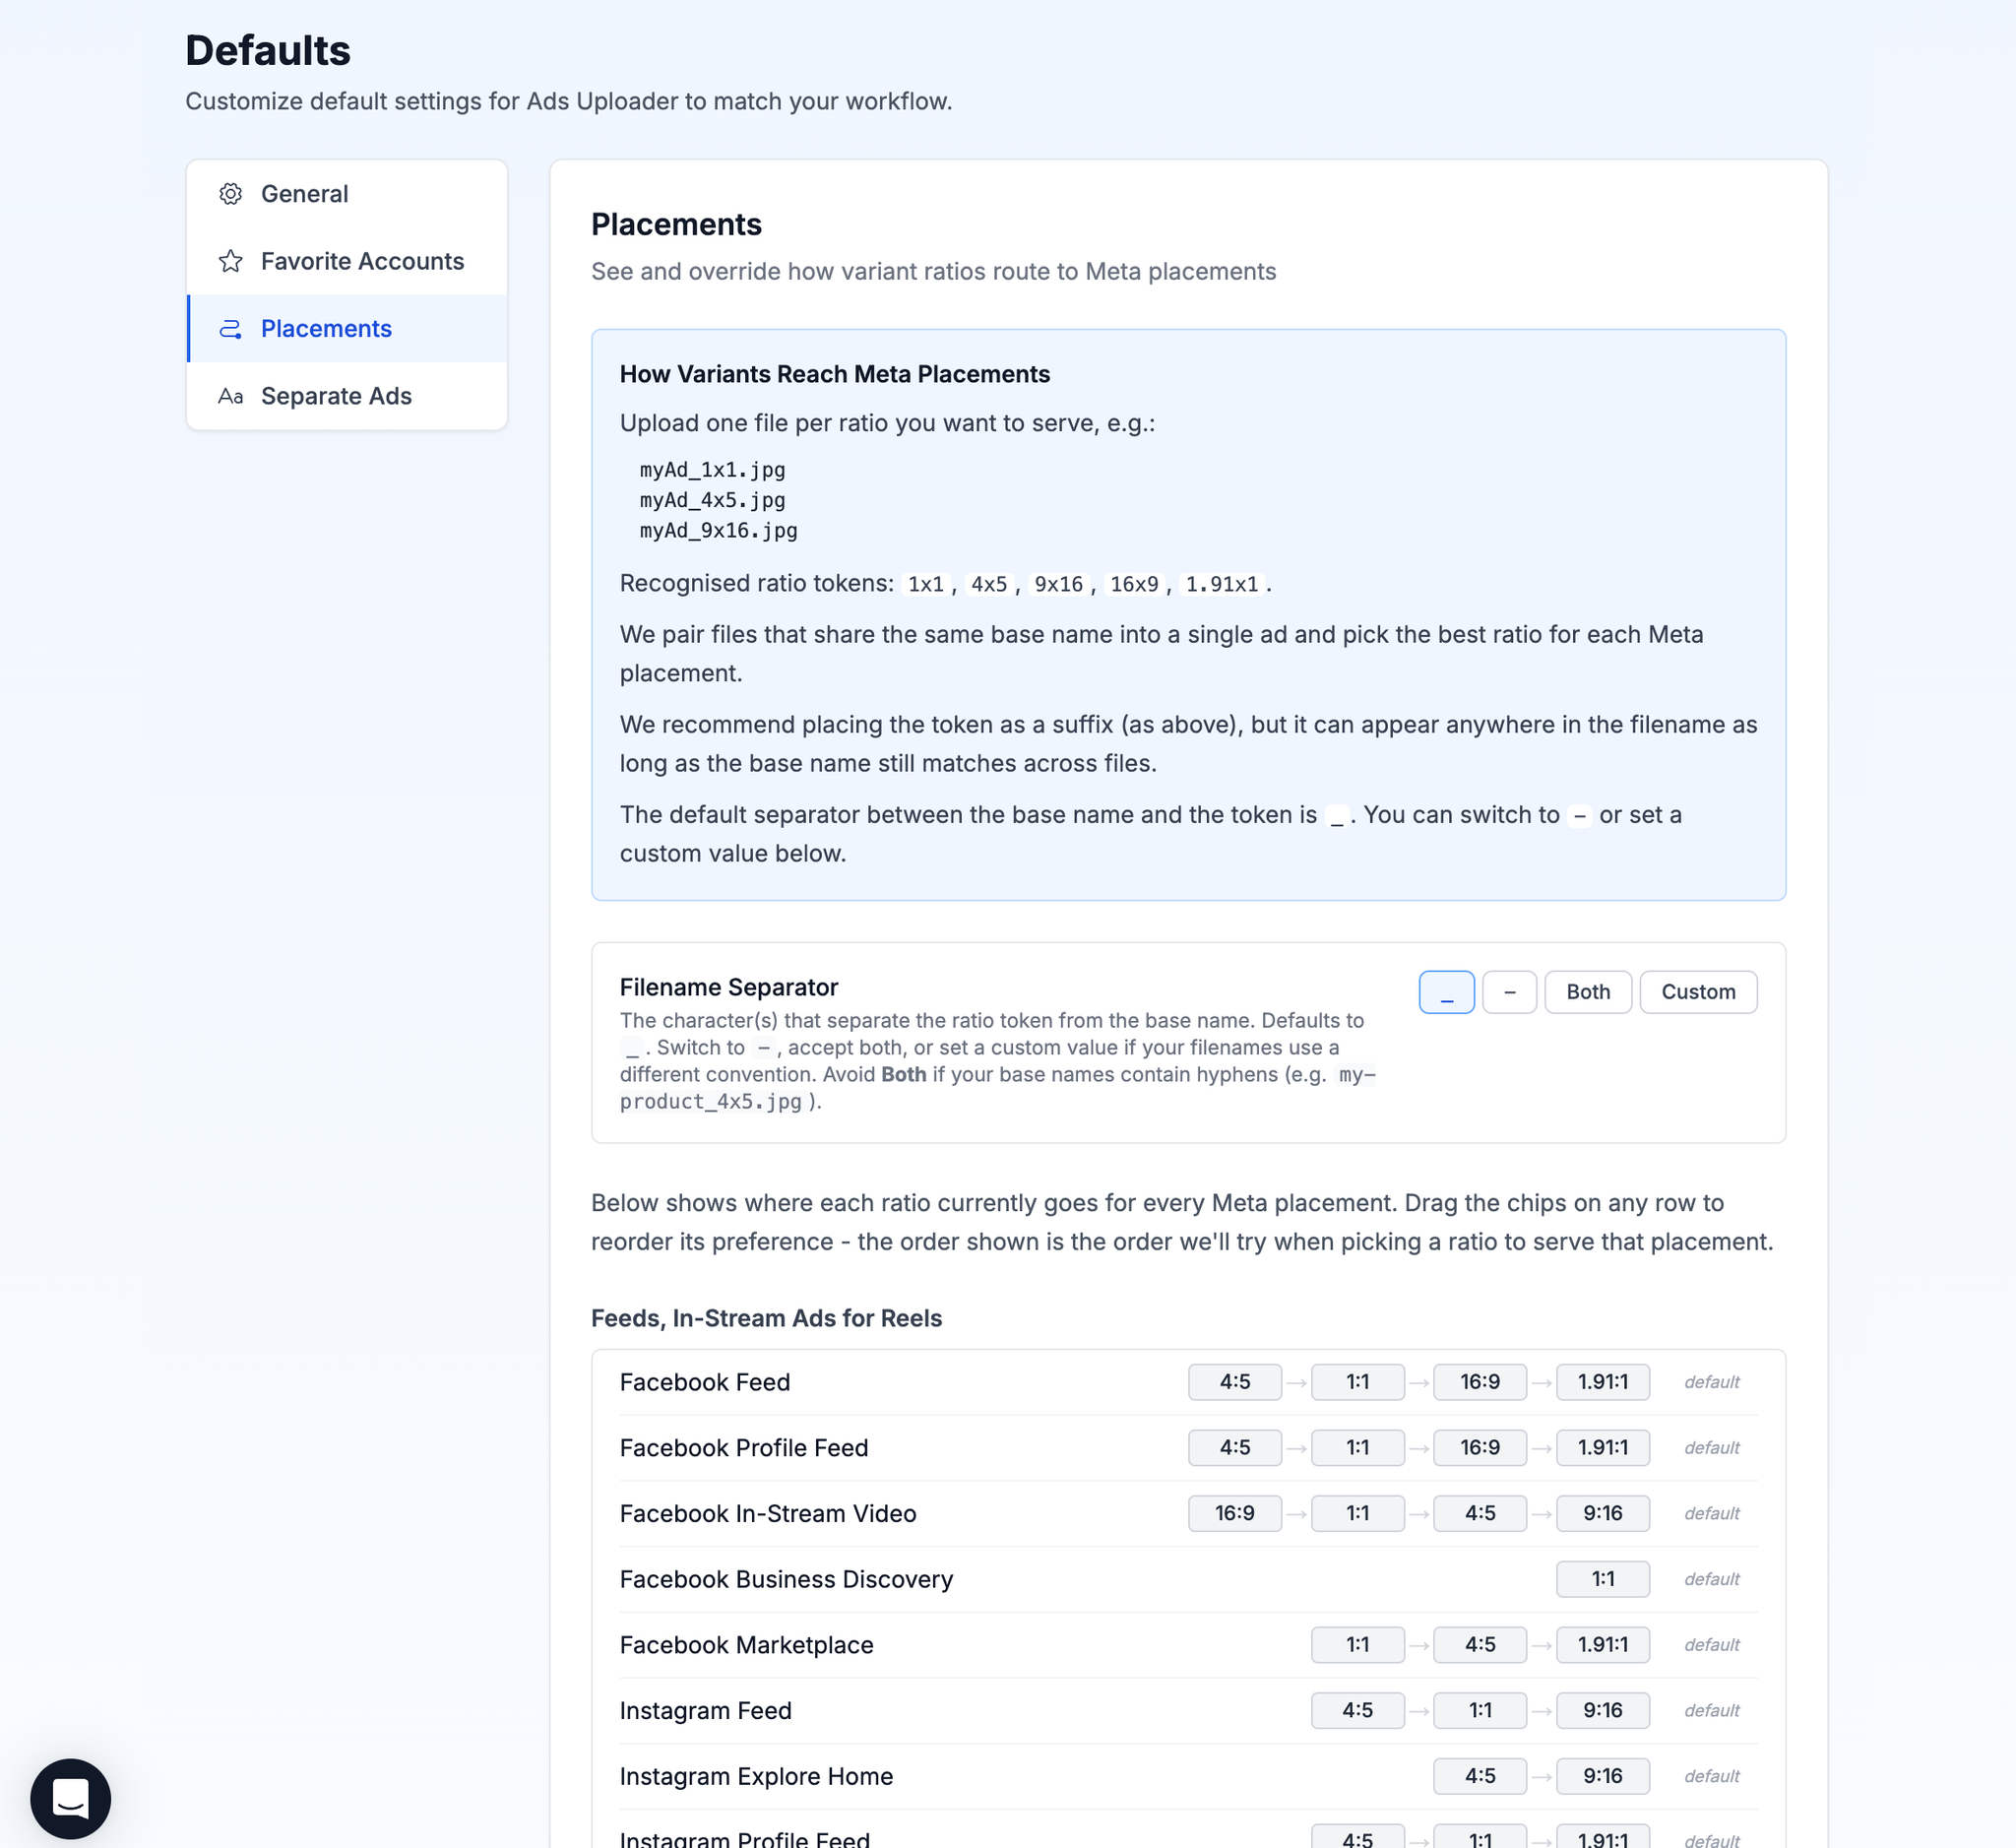
The default separator between the base name and the ratio token is an underscore (_). If your files use hyphens instead, go to Account > Defaults > Placements and change Filename Separator to -, Both, or a custom value. A space is not treated as a separator, so name files like BlackFriday_Hero_9x16.mp4, not BlackFriday Hero 9x16.mp4. See Aspect Ratio Variations for the full naming guide.
Each Placement Picks the Best Variant
Ads Uploader assigns each media variant to the placement it is best suited for. If the ideal variant is not available for a placement, Ads Uploader uses the next-best fallback automatically.
If you want more control, go to Account > Defaults > Placements. You will see placement rows like Feed, Reels, Stories, Right Column, and Audience Network, with ratio chips in priority order. Drag the chips to change which ratio each placement should prefer.
Thumbnails Work the Same Way
To attach a thumbnail to a video, use the same base name and add _thumbnail to the image file:
Video:     BlackFriday_Hero.mp4
Thumbnail: BlackFriday_Hero_thumbnail.jpg
Drop both files in and Ads Uploader matches them automatically. See Thumbnail Attachment for separator and suffix options.
Why this matters: without name grouping you would upload each video, wait for processing, configure each placement variant, attach each thumbnail manually, and repeat that for every creative. A consistent naming convention turns that into an automatic step. If your designer uses these suffixes from the start, the grouping step mostly disappears.
Step 3: Configure the Ads
Now tell Ads Uploader how your media should become ads. Configure Ads covers every option in detail; the short version follows.
Pick an Existing Ad as the Model
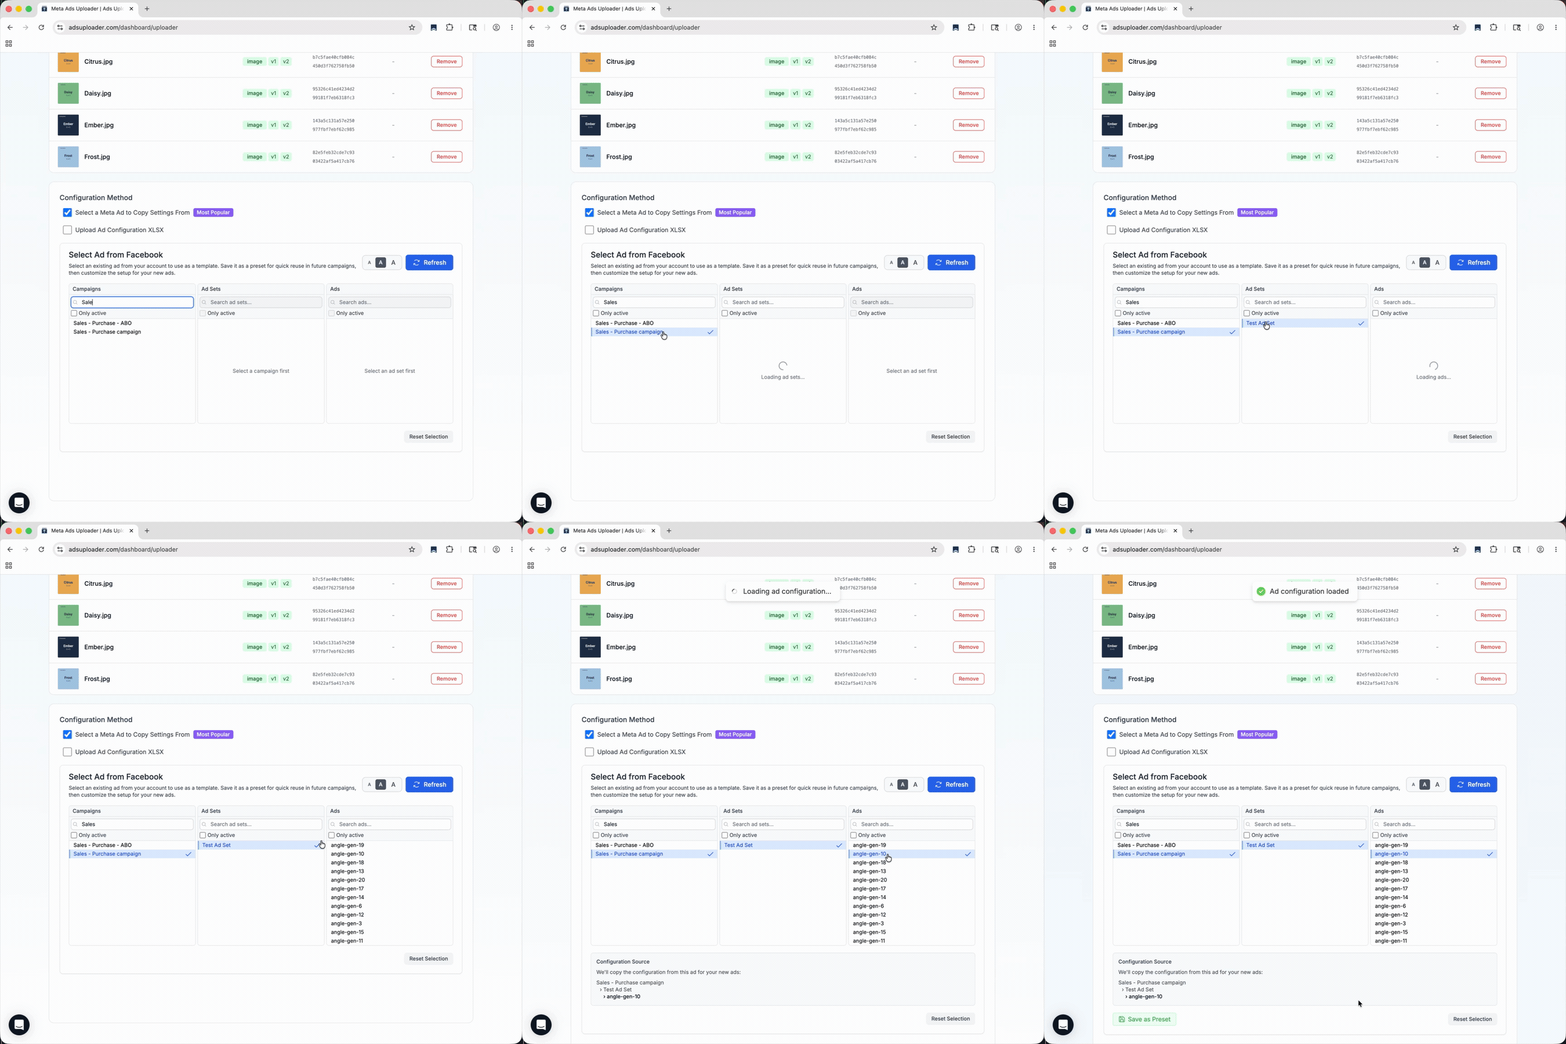
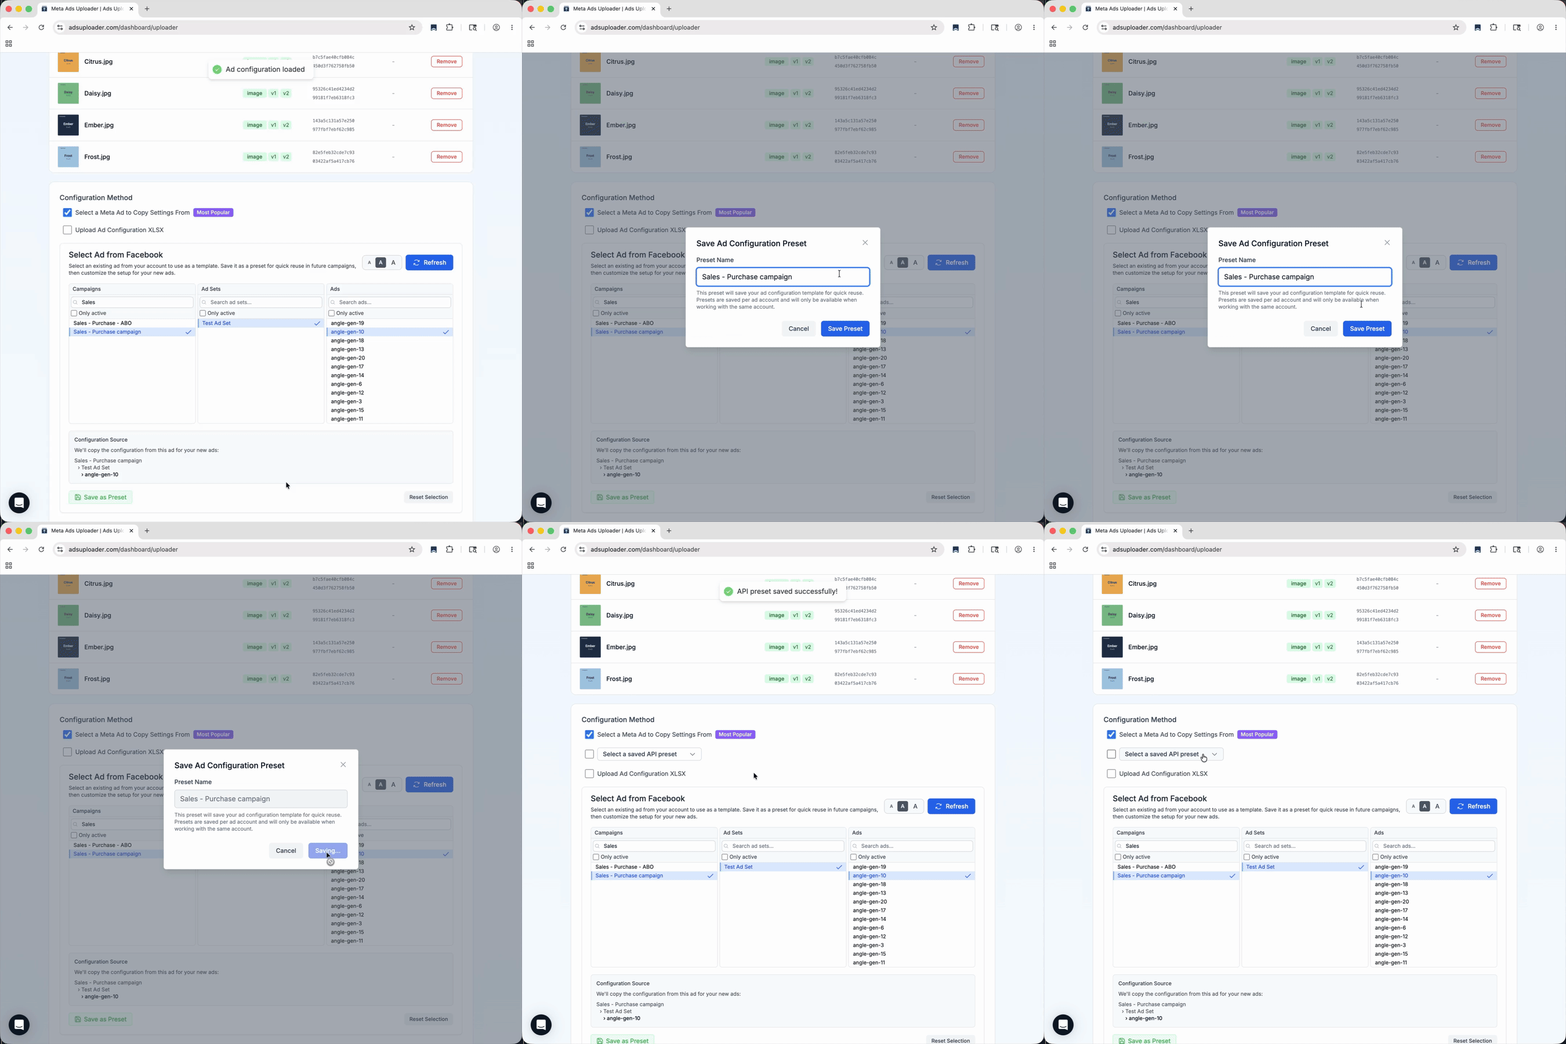
After your media is uploaded, choose an existing ad from the account under Select a Meta Ad to Copy Settings From. Ads Uploader uses that ad as the model for settings like campaign structure, targeting, pixel, exclusions, custom audiences, conversion event, and other configuration. If you need the new ad sets to target different countries, ages, or genders than the model, you can override those in the interface. See Ad Set Targeting.
This is not a global template. It is a way to reuse the setup from an ad that already works in the account you are launching into. Pick an ad that is already configured the way you want the new ads to behave, for example a prospecting ad as the model for a new prospecting launch, or a retargeting ad for a retargeting launch.
Save the Setup as a Preset
Once you have picked the model ad, save the setup as a preset. Use a name that clearly describes the account and use case, such as:
Demo Store Prospecting
Demo Store Retargeting
Demo Store Reels Test
A preset lets you reuse this setup next time without reselecting the same model ad and configuration. See Presets for how a preset's destination follows its model ad.
Choose the Ad Sets
Next, decide where the new ads should go. You can launch into the model ad's existing ad set, or pick Create new ad set, Create new ad set per upload or group, Auto-divide ads into ad sets, or Build custom ad set configuration. See Ad Grouping. The preview table shows how the launch will look before you create the ads.
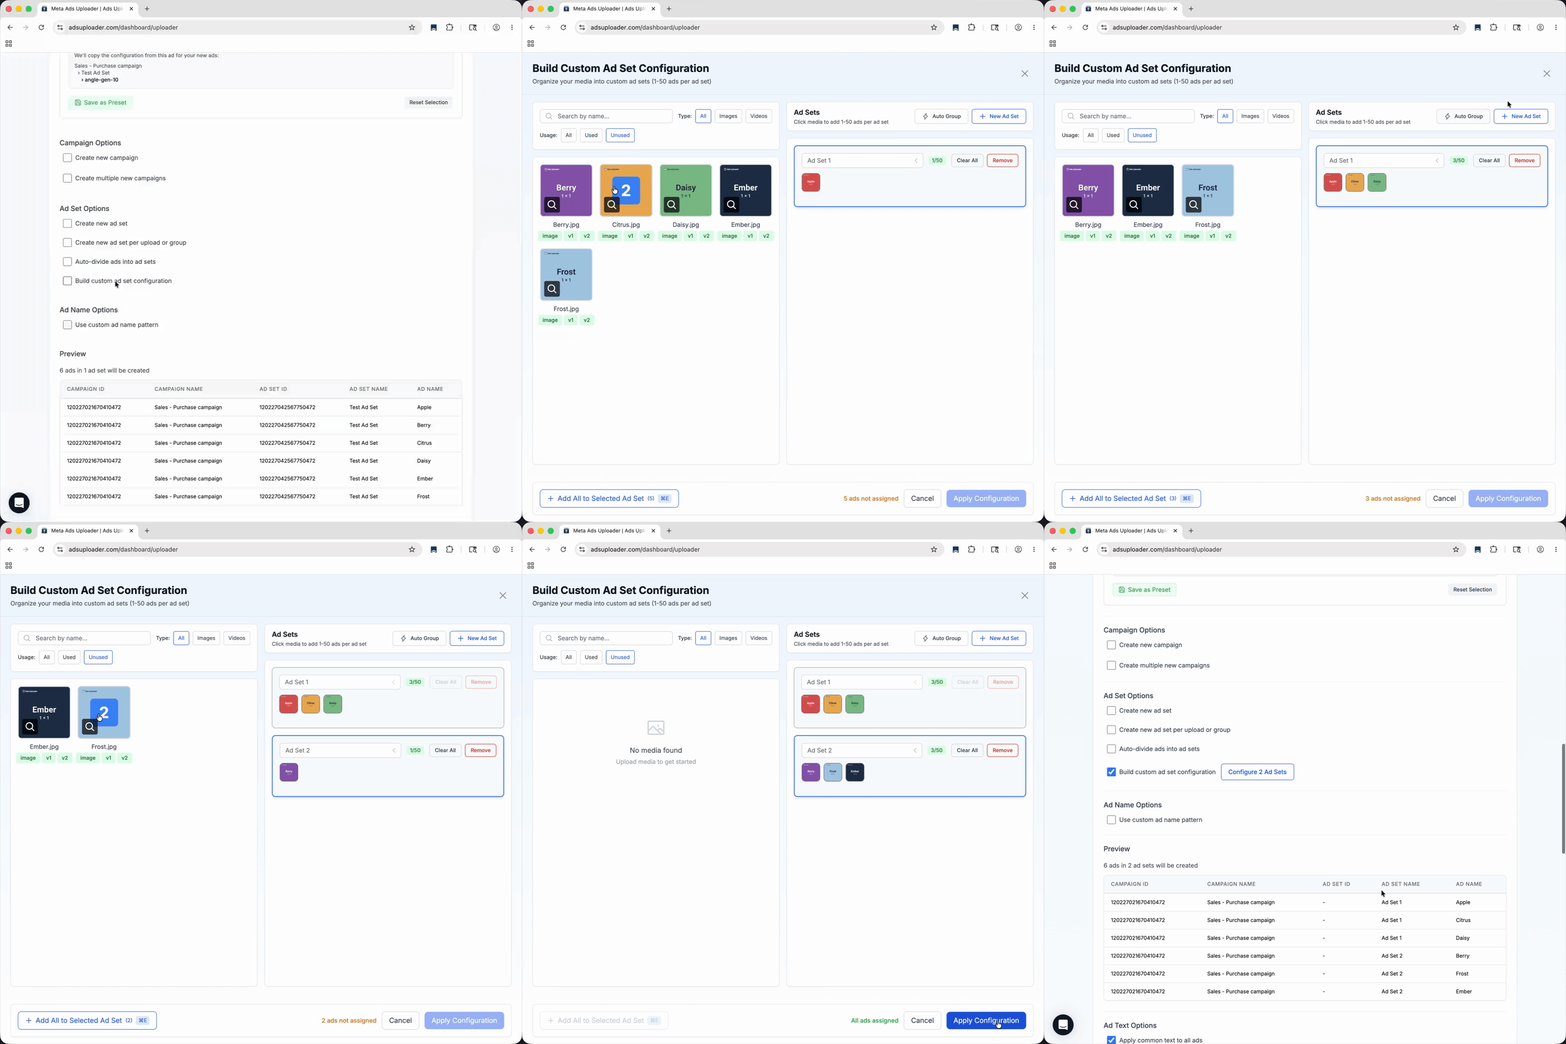
Tip: if you are unsure, start by launching into the existing ad set the preset was built from. Use splitting when you intentionally want to separate tests by creative, naming logic, or structure.
Review and Customize Text
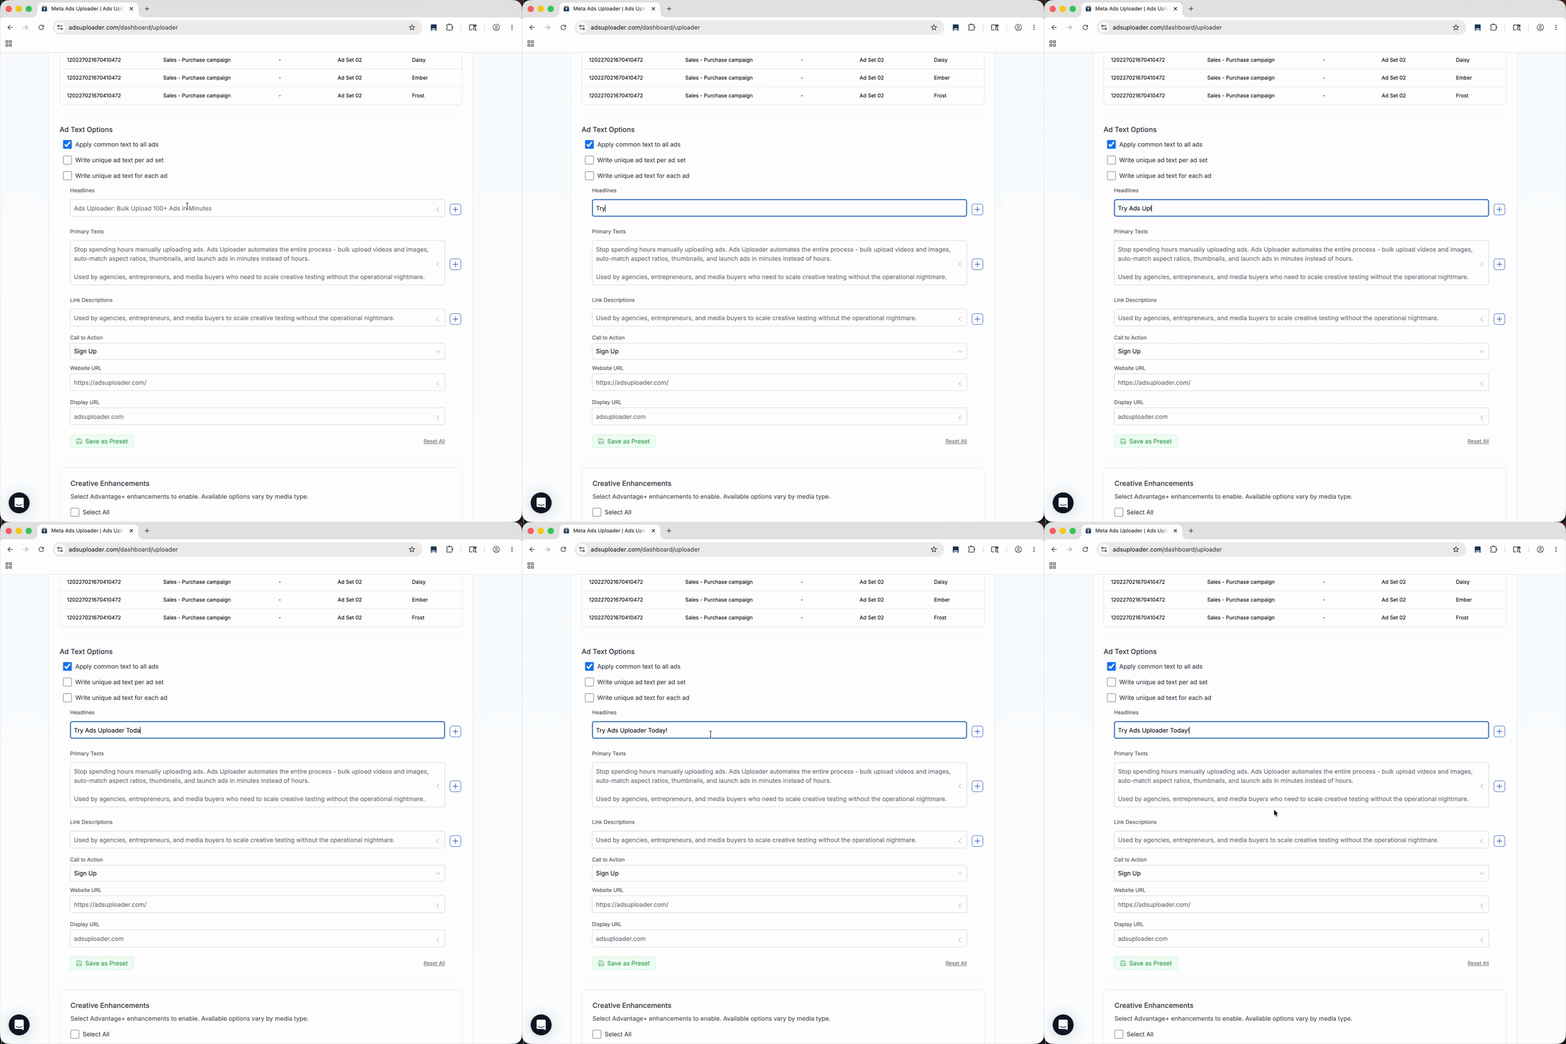
By default, Ads Uploader pulls in the text from the model ad: primary text, headline, description, URL, and URL parameters. You can edit text globally, at the ad-set level, or per ad.
- Use global edits when every ad should share the same copy.
- Use ad-set edits when each group needs different copy.
- Use per-ad edits when one creative needs a specific headline, URL, or parameter.
Review Creative Enhancements
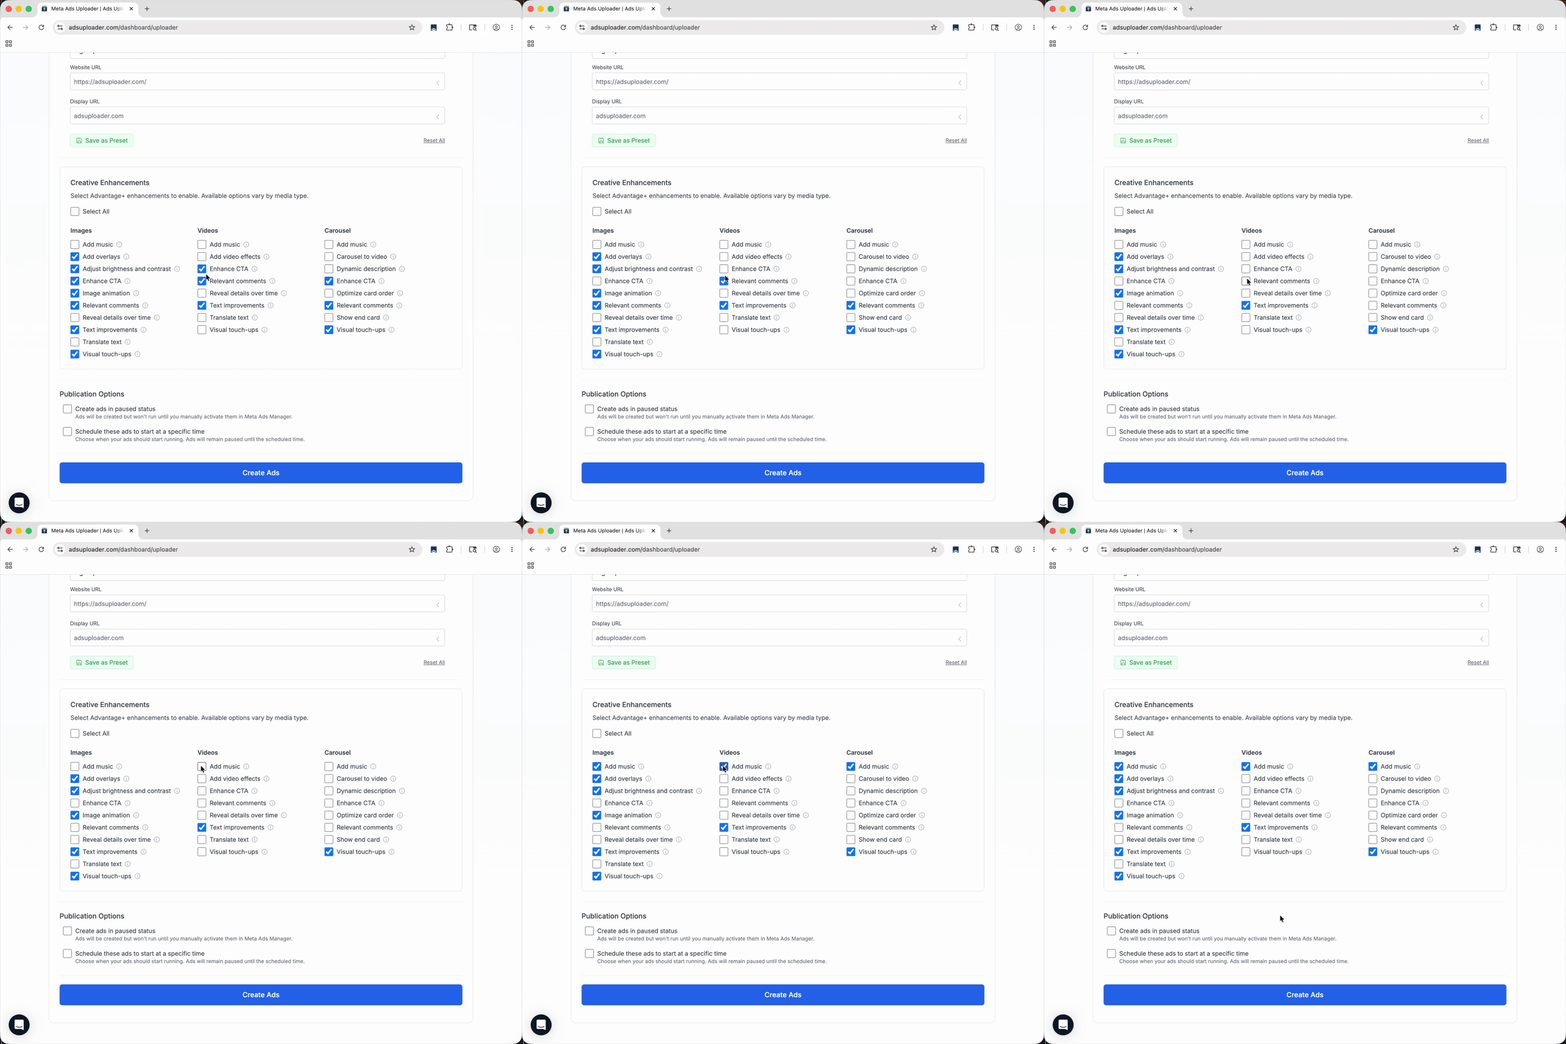
Creative enhancement settings are inherited from the model ad by default. If the model ad already has the settings you want, you can leave this step alone. If you need to override anything, toggle individual enhancements on or off before launch.
Step 4: Launch the Ads
When the preview looks right, click Create Ads. Ads Uploader sends the new ads directly to the selected Meta ad account using the configuration you reviewed. See Launching Ads for the publication options, the progress window, and what to do with the results.
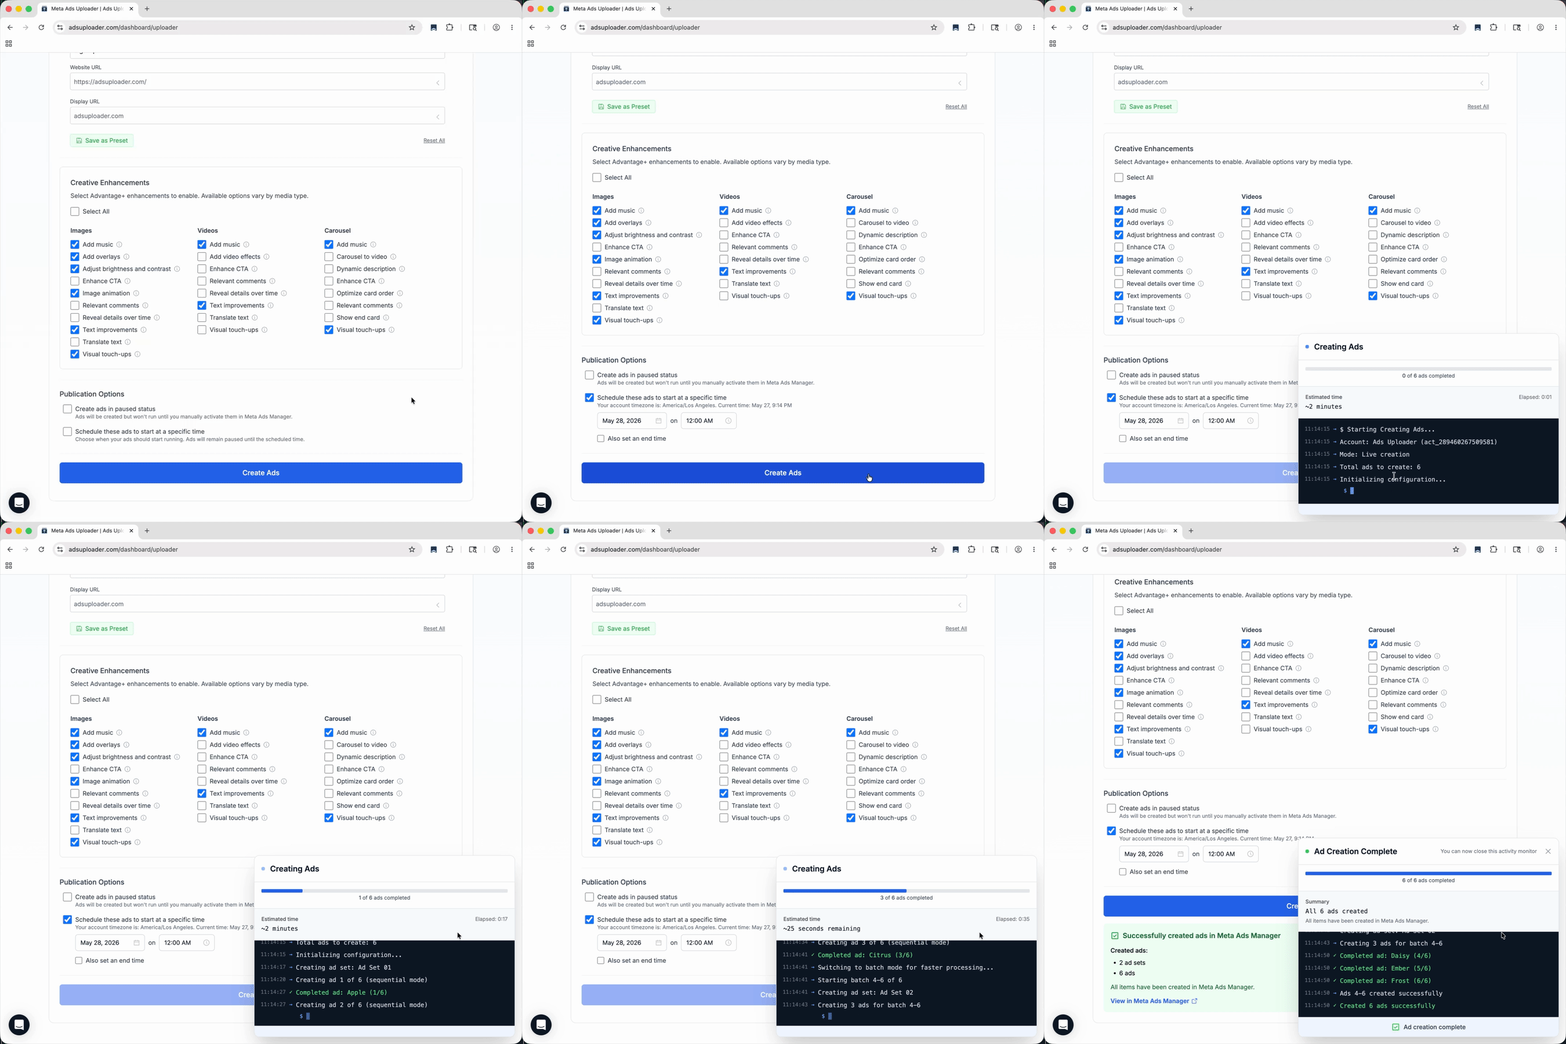
Before you launch, check: the selected ad account, grouped media, ad set configuration, ad text, URLs, URL parameters, and creative enhancements.
Quick Troubleshooting
My files did not group together. Check that the base name is identical across files and that each file carries a recognized ratio or thumbnail suffix. The suffix should be the only meaningful difference, and the separator must match the Filename Separator in Account > Defaults > Placements (an underscore by default), not a space.
My thumbnail did not attach. Check that the thumbnail uses the same base name as the video and includes _thumbnail in the file name.
The wrong ratio is being used for a placement. Go to Account > Defaults > Placements and adjust the ratio priority for that placement.
I am not sure which existing ad to use as the model. Ideally, choose an ad from a campaign that is already live and set up the way you want. Picture opening Ads Manager, finding the campaign you want to upload more ads into, and picking an existing ad from it. Ads Uploader uses that ad to learn how the new ads should be configured.
Copying Ads That Already Run?
This page is about launching new ads from new media. To copy ads that are already running and keep their likes and comments, use the Duplicator instead.
Using AI Agents?
Ads Uploader speaks to AI agents two ways. The CLI is built for end-to-end launches driven by a coding agent like Claude Code. The MCP connects Claude or ChatGPT to the campaign build you have open in the web app, so your agent can fill ad text, arrange ad sets, and draft copy while you keep the final click on Create Ads. Both follow the same upload, grouping, configuration, and launch logic as the web application.
Need Help?
Stuck on anything? Email support@adsuploader.com and we will help you sort it.