Uploader Panel Overview
The Uploader panel is the central hub for creating and configuring your Meta ads. It provides a streamlined workflow for uploading media and setting up ad campaigns.
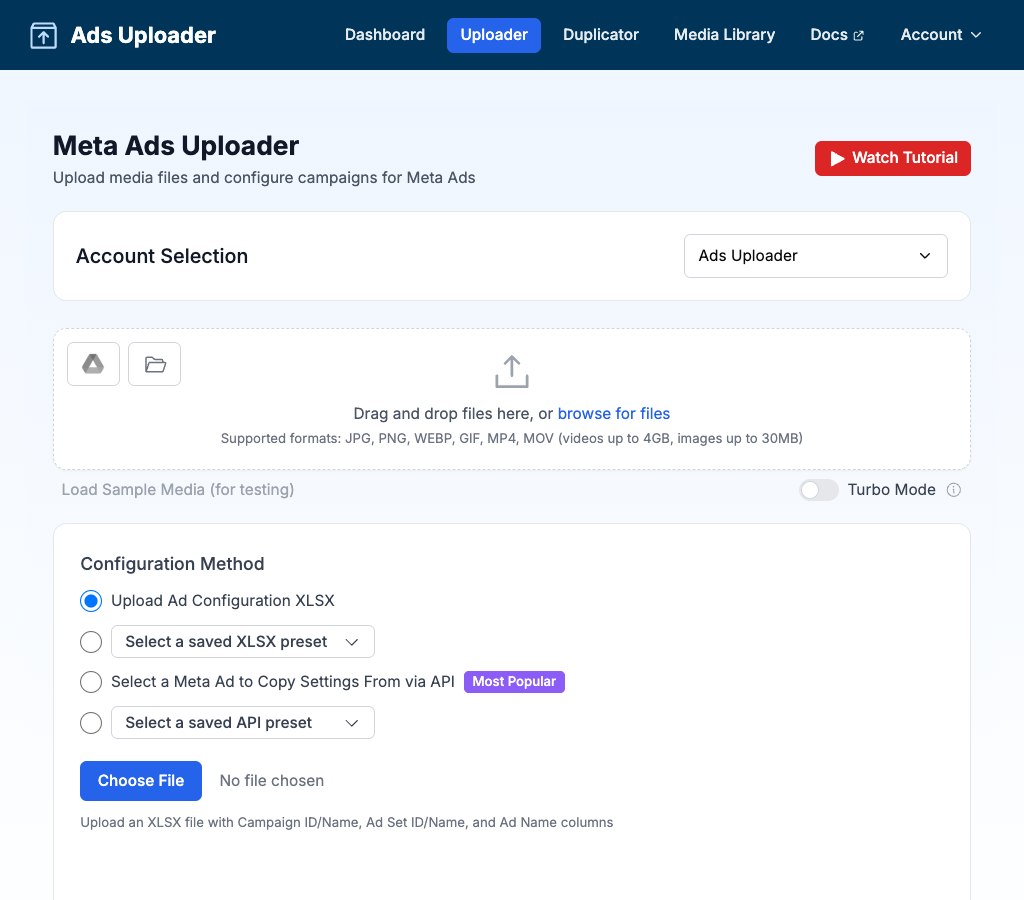
Account Selection
Located at the top of the panel, the account selector allows you to:
- Choose which ad account to work with
- Search accounts by name or ID
- Use keyboard navigation (↑↓ arrows + Enter)
Switching accounts clears all uploaded media and configuration to prevent mixing media across different accounts.
Media Upload Area
The drag-and-drop interface supports:
Supported Formats
- Images: JPG, PNG, WebP, GIF (up to 30MB)
- Videos: MP4, MOV, M4V (up to 4GB)
Upload Methods
- Drag & Drop: Drag files from your computer into the upload area
- Click to Browse: Click the upload area to open your file browser
- Google Drive Import: Import files directly from Google Drive (Learn more)
- Media Library: Load previously uploaded media from your Media Library (Learn more)
You can select multiple files at once with any method.
Two-Step Upload
After selecting files, you'll see a Selected Files list where you can review and remove individual files before uploading. Click the Upload button to start uploading to your ad account.
During upload, a progress panel shows:
- File-by-file progress with transfer speed
- A real-time activity log
- Option to minimize and continue working
- Cancel button to abort
Upload Speed
Turbo Mode provides faster, more reliable uploads. The toggle appears below the upload area. Learn more
Uploaded Media Table
Once files are uploaded, they appear in a table showing:
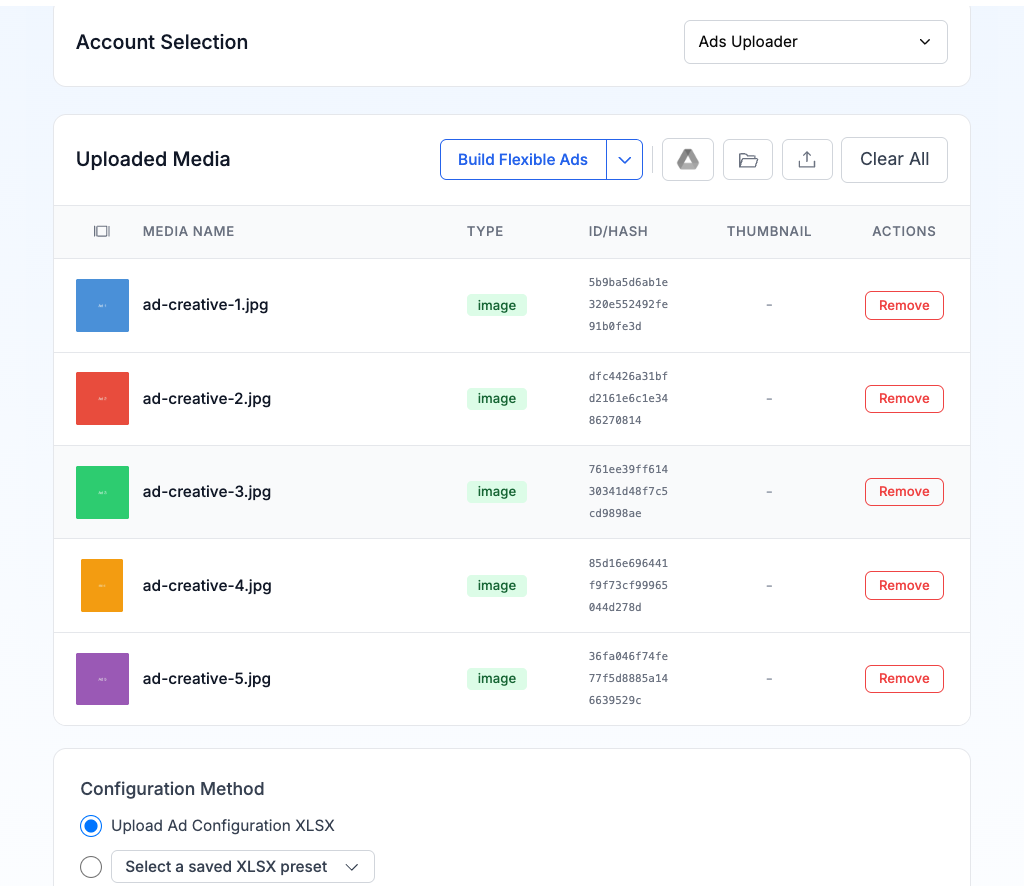
| Column | Description |
|---|---|
| Preview | Thumbnail with click-to-preview |
| Media Name | Original filename |
| Type | Image or video, with aspect ratio variant chips (v1, v2, h, w) |
| ID/Hash | Facebook media identifier |
| Thumbnail | Custom thumbnail status for videos |
| Actions | Remove individual files |
Toolbar
Above the table, the toolbar provides:
- Build Flexible Ads - Open the Flexible Ads builder (Learn more)
- Build Carousel Ads - Open the Carousel Ads builder (via dropdown arrow) (Learn more)
- Google Drive - Import additional files from Google Drive
- Media Library - Load more files from your Media Library
- Upload More - Add more files from your computer
- Clear All - Remove all uploaded media
Smart File Detection
Ads Uploader uses intelligent file naming to automatically organize your media. The system detects:
- Thumbnail associations
- Aspect ratio variations
- Variation groupings for A/B testing
See detailed guides:
Configuration Methods
Below the media table, choose how to configure your ad structure:
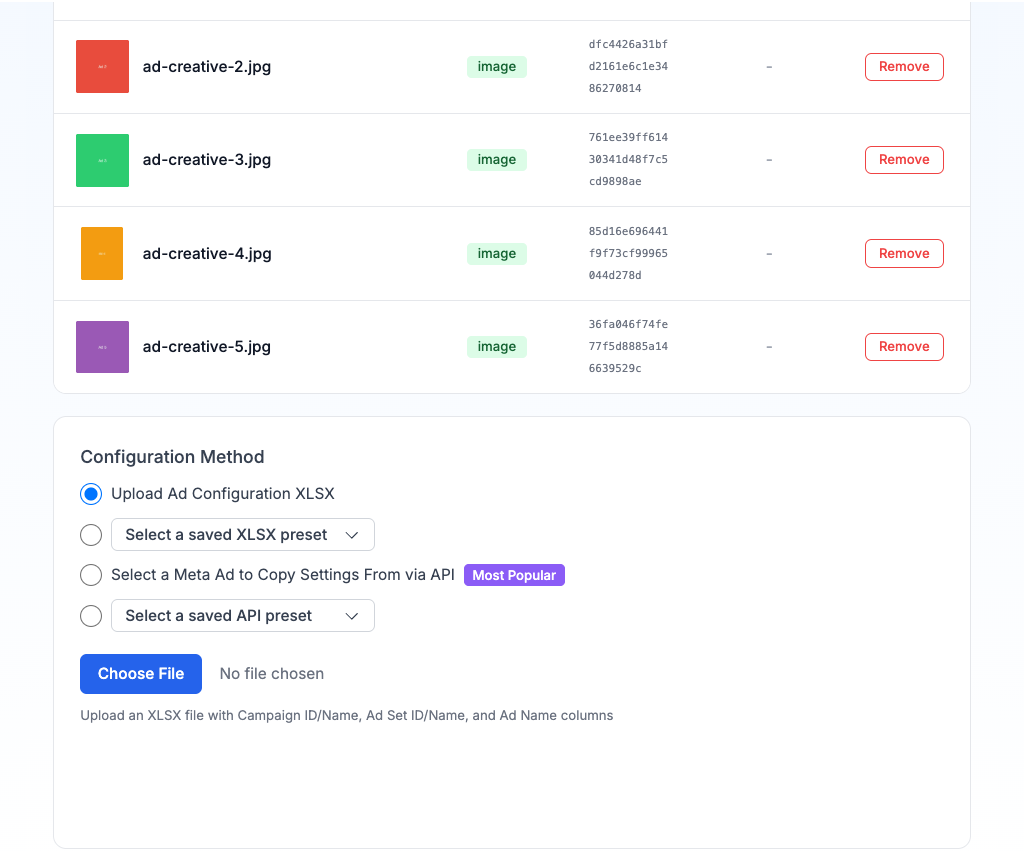
| Method | Description |
|---|---|
| Upload Ad Configuration XLSX | Upload an exported XLSX from Meta Ads Manager |
| Select a saved XLSX preset | Reuse a previously saved XLSX configuration |
| Select a Meta Ad to Copy Settings From | Browse your account and pick an existing ad as a template (Most Popular) |
| Select a saved API preset | Reuse a previously saved ad setup (this is the in-app name for a saved preset) |
See detailed guides:
Upload Process
- Select Account - Choose your working ad account
- Upload Media - Drag and drop files, then click Upload
- Choose Configuration - Copy an existing ad or upload a spreadsheet
- Set Options - Campaign, ad set, and naming preferences
- Configure Text - Add headlines, body text, CTAs, and destination URLs
- Create Ads - Create ads directly in your account or export an XLSX