Sign Up and Connect Meta
This is the first page to read if you are new to Ads Uploader. It takes you from no account to a dashboard that is connected to your Meta ad accounts. It usually takes a few minutes.
You will:
- Create your account with your email address.
- Connect your Facebook profile so Ads Uploader can reach your ad accounts.
- Pick the ad account you want to work in.
Create Your Account
- Go to the sign-up page at
/signup. The page is titled Create Your Account. - Enter your email in the Email Address field.
- Click Create my account. You will see "Check your email for a sign in link!"
- Open the email and click the link. It signs you in and takes you to your dashboard.
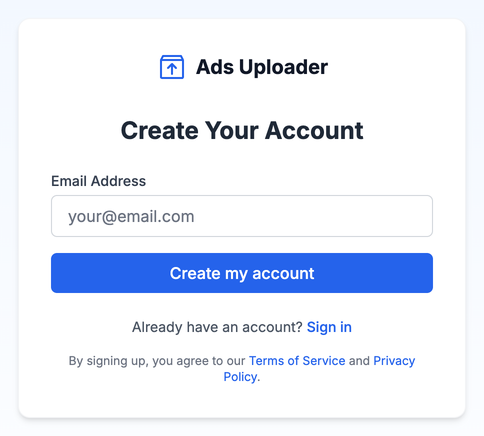
There is no password. Every time you sign in, Ads Uploader emails you a new link (often called a "magic link"). This keeps your account safe without a password to remember or leak.
Sign In Next Time
Go to /signin, enter the same email address, and click Sign in. Then click the link in the email. If the email does not arrive within a minute or two, check your spam or promotions folder.
Your Free Trial
New accounts start with a 7-day free trial. You do not need a card to start it, and there is nothing to cancel if you decide not to continue: the trial simply ends. While you are on the trial, the dashboard shows a notice with your trial status.
When you are ready to subscribe, go to Account > Billing. See Billing for plans and prices.
Connect Your Facebook Profile
Ads Uploader works through Meta's official API. To create ads for you, it needs your permission to act on the ad accounts, Pages and Instagram accounts your Facebook profile can already manage. You give that permission by connecting your Facebook profile.
Until you connect, a Connect to Meta banner appears at the top of the dashboard, and the Uploader, Duplicator and Media Library show a similar banner asking you to connect.
- On the dashboard, click Connect with Facebook in the Connect to Meta banner.
- Log in to Facebook if Meta asks you to.
- Review the permissions and choose which assets to share (see below).
- Confirm. Meta sends you back to Ads Uploader.

You can also connect from your profile: open Account > Profile, find the Facebook card, and click Connect Facebook Account.
What Meta Asks You to Approve
Meta shows you a list of permissions before you confirm. Here is what each one is for, in plain words:
| Permission | Why Ads Uploader needs it |
|---|---|
email | Reads the email address on your Facebook profile so your connection can be matched to your account. |
ads_management | Creates and manages ads, ad sets and campaigns in your ad accounts. This is the core permission. |
business_management | Sees the ad accounts, Pages and other assets that belong to your Business portfolios, not just the ones you own personally. |
pages_show_list | Lists the Facebook Pages you manage, so you can choose which Page an ad runs from. |
pages_manage_ads | Lets new ads run from your Facebook Pages. |
pages_read_engagement | Reads your Pages' posts and details, for example when you reuse an existing post. |
instagram_basic | Sees the Instagram accounts linked to your Pages, so ads can show under your Instagram account. |
catalog_management | Gives access to the product catalogs in your business, so catalog features can work without asking you to reconnect later. |
facebook_branded_content_ads_brand, instagram_branded_content_ads_brand, instagram_branded_content_brand | Lets you run partnership ads (branded content ads) with creators on Facebook and Instagram. |
Choose Which Assets to Share
Meta also asks which businesses, Pages, ad accounts and Instagram accounts you want to share with Ads Uploader. Select every asset you plan to use. Anything you leave out does not appear in Ads Uploader, even though you can see it in Ads Manager.
If you left something out, go to Account > Profile and click Reconnect Facebook on the Facebook card. Meta shows the permission and asset screens again, and you can add what was missing.
One Facebook Profile per Account
Each Ads Uploader account connects to one Facebook profile. You can switch to a different profile later, but after a switch you must wait 28 days before switching again. See Managing Your Meta Connection for the full rules.
"Facebook Account Already Used"
If you see a red Facebook Account Already Used notice after connecting, that Facebook profile has already been used for a free trial on another Ads Uploader account. Each Facebook profile gets one free trial, and the Uploader and Media Library stay greyed out while this notice shows. To keep going, upgrade to a paid plan in Account > Billing. If you think this is a mistake, email support@adsuploader.com.
Your Dashboard
Once you are connected, the dashboard greets you by name and shows three tiles:
- Upload Ads: upload images and videos and launch them as new Meta ads. This is the Uploader, and most of these docs are about it.
- Duplicate Ads: copy ads that are already running while keeping their likes and comments. See Duplicator.
- Manage Media: browse and manage the media you have uploaded to your ad accounts. See Media Library.
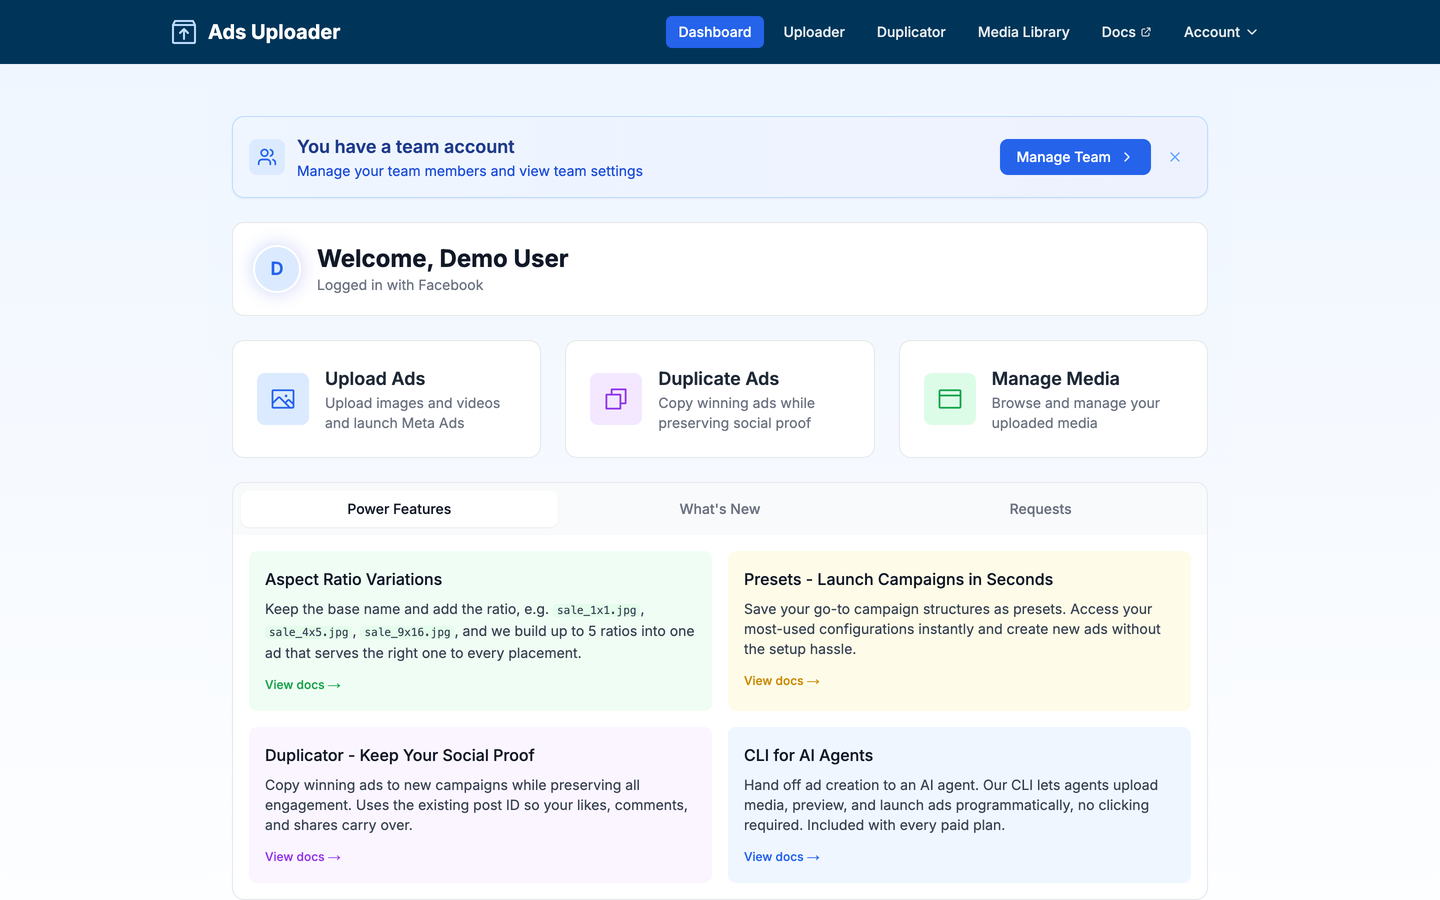
The first time you open the dashboard, Ads Uploader asks how you heard about it and then starts a short guided walkthrough. The walkthrough points at each step on screen: connect Meta, open the Uploader, choose an ad account, select and upload files, then configure and launch.
Pick Your Ad Account
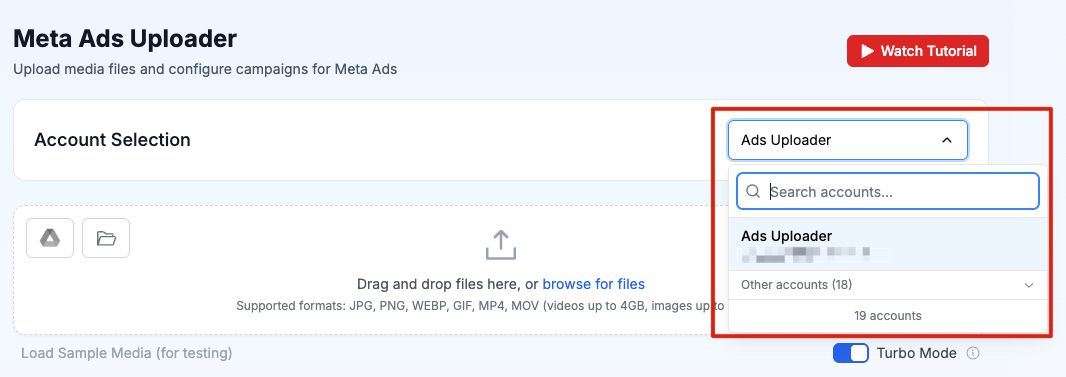
Open the Uploader from the Upload Ads tile. At the top, under Account Selection, click the account dropdown and choose the ad account you want to work in.
- Type in the Search accounts... box to filter by account name or ID. Use the arrow keys and Enter to pick one without the mouse.
- If an ad account is missing, click the refresh button next to the search box to reload your accounts from Meta. If it is still missing, reconnect and make sure you selected it on Meta's asset screen.
- Switching to a different ad account clears the media and settings you have on screen, so finish one account before moving to the next.
Mark Your Favorite Accounts
If you manage many ad accounts, mark the ones you use most as favorites. Go to Account > Defaults > Favorite Accounts and star them. Favorites appear first in the dropdown, and everything else moves into a collapsible Other accounts section. This saves scrolling through a long list every time.
Replay the Walkthrough
You can run the guided walkthrough again at any time. Go to Account > Profile, find the Onboarding card, and click Replay onboarding tour. Ads Uploader opens the Uploader and starts the tour from the beginning.
Next Steps
- Overview: a full walkthrough of a launch, from upload to Create Ads.
- Uploader Panel: how to upload and organize your media.
- Configure Ads: pick a source ad and set up campaigns, ad sets and text.
- Launching Ads: create the ads in Meta and check the results.